

Setting Up Shared Catalogs
To start setting up Shared Catalogs, you first need to create a Shared Catalogs export profile on Akeneo PIM.
- Log in with a user account. You need to have an export profile permission (more information in Manage the interface and actions accesses article)
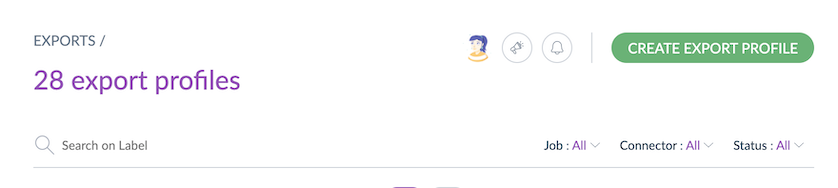
- Go to the Exports menu
- Click on Create export profile
- Fill in the following fields with:
- A unique code
- A name to easily identify the catalog linked to this export profile
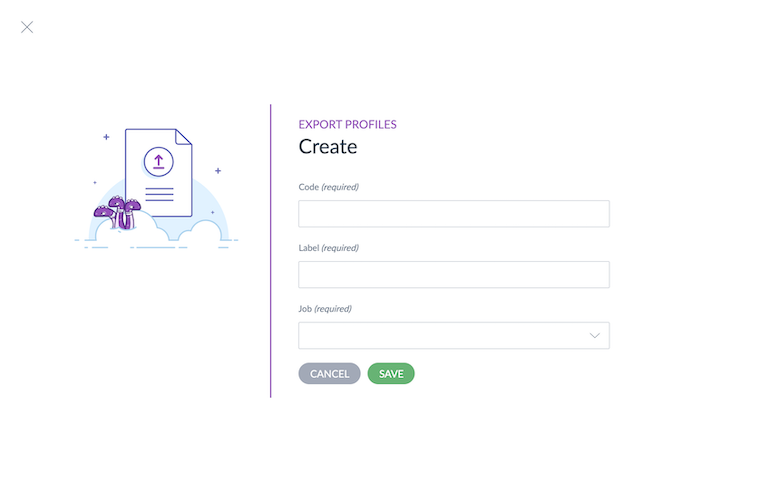
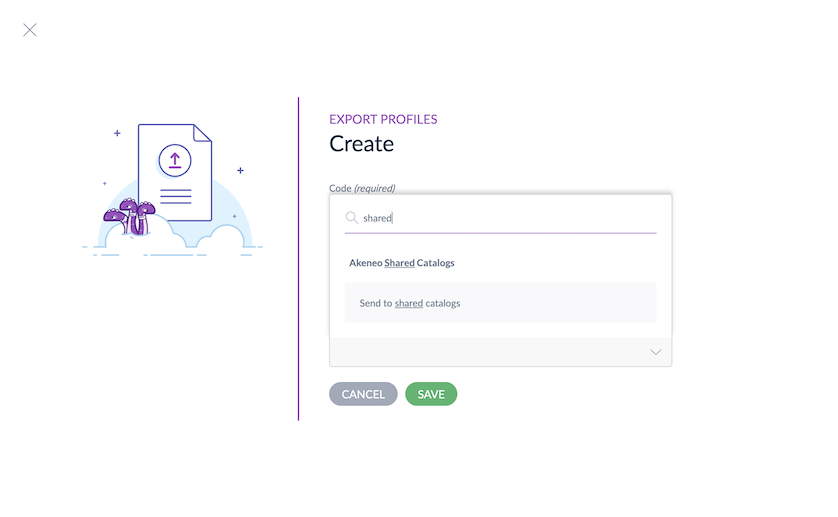
- Then, you need to select the option Send to Shared Catalogs in the job list.
- Click on Save to finalize the export profile creation. You will be redirected to the profile page screen, where you can then configure your Shared Catalog.
Product Selection and Filtering
To define the product selection of a dedicated Shared Catalog, click on Content tab.
Then, you will land on a page divided into two sections:
-
Filter the data: this part allows you to define the data in the Shared Catalog.
- Channel and Locales are required fields. They allow you to filter product data on the selected channel and the selected locales will be available for your catalog users.
- The Attributes field allows you to select the attributes you want to display on Shared Catalogs.
- And Preset attribute filters help you preselect the attributes your users will see as filters in the Shared Catalogs product grid.
- Filter the products: this part allows you to filter your products using product attributes and system properties such as Family, Category, Status, Completeness or even insert a list of Identifiers. Using the button Add attributes, you can add any attribute to use them to filter your products.

If you want to know how to handle the filters in detail, take a look at Filter your product selection.
Please note that Shared Catalogs manages locales with text-only codes. Locales containing numbers should not be used to create a catalog.
To maintain high performance, Shared catalogs have the following product limits:
- Serenity or Flexibility v7.0: Maximum of 200,000 products at creation.
- Flexibility 6.0 or older: Maximum of 100,000 products at creation.
Please note that the limit may vary depending on the PIM activity (number of products updated per hour).
After creating the Shared catalog, you can increase the number of products, but it must not exceed 500,000.
Important: If your Shared catalog exceeds the product limit at creation, you cannot reset your catalog. E.g: if you are in Serenity and create a shared catalog with 200,000 products and then add another 200,000 products during next synchronization, totaling 400,000 products, you will not be able to reset or modify the catalog because Shared catalogs can only manage up to 200,000 products at a time. Therefore, you will need to proceed in batches.
Manage the recipients
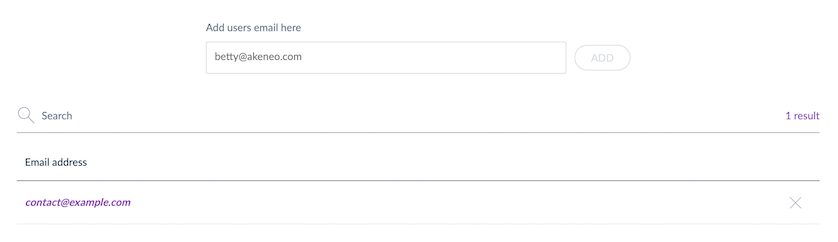
This Recipients tab allows you to give access to the current Shared Catalog using email addresses.
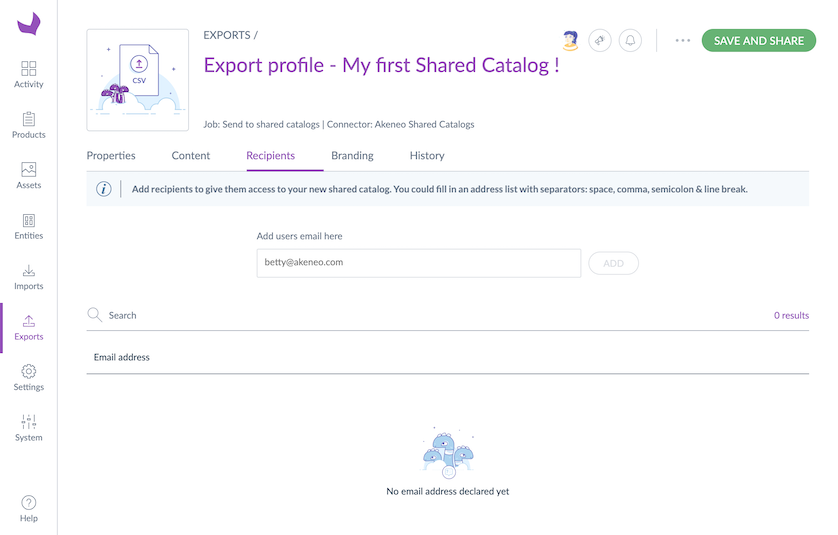
Add Recipient
An email address identifies a recipient. To grant access to your Shared Catalog to a new recipient, you must write their email address in the dedicated field and click on Add. The recipient is now added, and their email address appears in the list.
To save time, you can add multiple recipients at a glance. Copy/paste a list of email addresses with separators (space, comma, semicolon, or line break are supported) and then, click on Add. All email addresses will be automatically added to the recipient list.
The recipients will receive an email with instructions on how to create an account or, if they are already Shared Catalogs users, directly access the login page of the new Shared Catalog.
Don’t forget to click on Save and Share if you want to give direct access to your new recipient.
Remove a recipient
If you need to revoke one recipient's access to the Shared Catalog for any reason, remove the recipient's email address from the list using the cross icon.
Don’t forget to click on Save and Share to validate your action. Otherwise, the email address won’t appear in the list, but the recipient will still have access to the Shared Catalog.
To send a new invitation email to your recipient, you can delete it, save your Shared Catalog profile and only add it again after 10 minutes. Otherwise, the recipient will not receive the email as our sychronization process will detect the updates only every 10 minutes.
Customize the branding
To customize your Shared Catalog portal to fit your corporate brand identity, you have 3 options:
- LOGO: Add your brand logo
- COVER: Select a cover image for the portal login page
- COLOR: Define an accent color to be used for headings, some text, icons and some other UI elements.
Add / Update the logo
You can drag and drop or select a file to upload it. PNG and JPG formats are supported. The file's maximum size is 2 MB.
This image will be displayed on the Shared Catalogs login page. For an optimal appearance in both formats, we recommend an image in portrait orientation with dimensions of at least 1080px x 1280px in PNG or JPG format.
On the login page, the appearance of the cover image may vary depending on the size of a user’s browser. The zone in the center of the image can be considered a “safe-space” for the most important parts of your chosen image (e.g. if the image contains logo, text, etc).
Select or update the Login page cover
Please follow the same process as for the logo.

On the login page, the appearance of the cover image may vary depending on the size of a user’s browser. The zone in the center of the image can be considered a “safe-space” for the most important parts of your chosen image (e.g. if the image contains logo, text, etc).
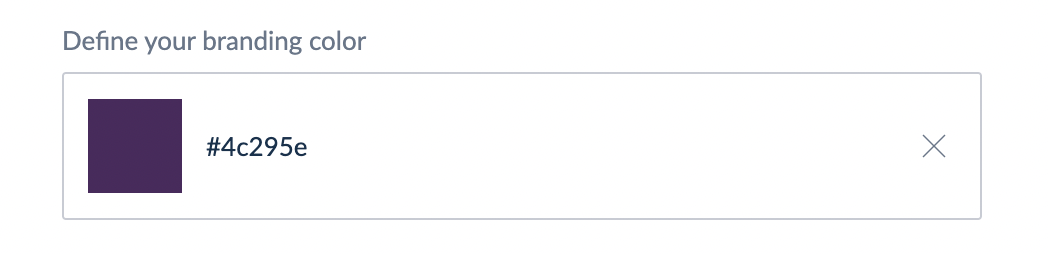
Define or update the accent color
One accent color can also be selected. It will apply to specific areas of the Shared Catalogs portal and the PDF exports. To ensure good visibility and accessibility, select a color that will be highly contrasted against a white background (e.g., a navy blue will be more contrasted than a light pastel blue).
Remove these branding options
If you want to remove your logo, click on the cross in the right corner. If you haven't defined one yet, a Shared Catalogs logo will be displayed by default. The same process applies to the cover and the accent color.
You can customize one or all these options, or you can skip this step. In the latter case, the default settings will apply.
Cover & font color options are only available for Serenity & Flexibility version 7.0 PIM users
Configure PDF settings
You can now customize your PDF exports to suit your brand guidelines.
Two elements can be modified on the PDF export:
- Cover page: You can now upload your covers for use in PDF generation.
- Style: It is now possible to customize the font and colors of the PDF, as well as a logo to be displayed on all pages.
Manage your cover page
Upload your cover page
- Go to the PDF settings tab of your export profile.
- Click on Upload Cover. A new modal window will appear.
- Fill in the required information:
• Name: Enter the name of your cover.
• Upload cover: Upload the cover file in PDF - A4 format (the file size must not exceed 10MB).
• Status: Choose whether to activate or deactivate the cover.
• Set as default cover: Check this option if you want this cover to be the default for future exports (users can still choose a different cover if they prefer). - Once all fields are filled, click Save.

Edit the Akeneo default cover
- Go to the PDF settings tab of your export profile.
- On the Akeneo cover row, click on Edit. A new modal window will appear.
- Fill in the required information:
• Upload cover image: Upload the cover image in PNG or JPG format (the file size must not exceed 10MB).
• Status: Choose whether to activate or deactivate the cover.
• Set as default cover: Check this option if you want this cover to be the default for future exports (users can still choose a different cover if they prefer). - Once all fields are filled, click Save.

Adapt PDF style
Font
You can now set the font for all text and titles in your PDF export.
List of available fonts:
- Lato (default)
- Roboto
- Open Sans
- Lora
- Merriweather
- Montserrat
- Source Code Pro
- PT Serif
- Noto Sans
- Playfair Display

Font color
Select a color for your text and titles using a hex code.

Background color
Choose a color to use for your document background using hex code.

Branding color
Choose a color to use as an accent for title underlines using hex code.

Logo
Upload a PNG or JPG logo to display at the top center of each page (except the cover page).
Recommended size: 270px x 50px
Maximum file size: 10MB

Congratulations on creating a Shared Catalog! In a few minutes, the recipients will receive an email with instructions on accessing the new Shared Catalog.
Do not worry if all the products are not immediately visible in the newly created Shared Catalog. Depending on its size it can take some time to synchronise everything properly.