Overview
This feature consists of an export profile, available only for our Enterprise Edition or Growth Edition users. It helps you to export your product information in XLSX or CSV files with your structure.
For instance, let's assume your retailers or distributors need the same product information from you, but they want different structures:
- Retailer A wants an export with columns named: "Identifier", "Product Name", "Description", and "Weight (Ounces)".
- Retailer B wants an export with columns named: "Name in French", "Name in English", "Description 1", "ID", and "Weight (Kilograms)".
Without Tailored Export, you have to export your product information thanks to a regular product export profile and manually modify your spreadsheet to reorder the columns, change their name, convert the measurements for as many retailers and distributors who needs it.
Thanks to Tailored Export, prepare the work from Akeneo PIM creating a Tailored Export profile per your retailer's or distributor's requirements, and use it as often as necessary. You no longer need to manually edit your XLSX or CSV files when sharing product information.
🎓 Put your knowledge into Practice
Please watch our dedicated training to learn more about Tailored Export and how to use this feature.
Course time: 10 min
Create a tailored product export profile
To create a tailored product export:
- Go to Exports
- Click on Create export profile
- Type a unique export code and a label, then select the job Tailored product export or Tailored product model export. You can select either CSV or XLSX for each job.
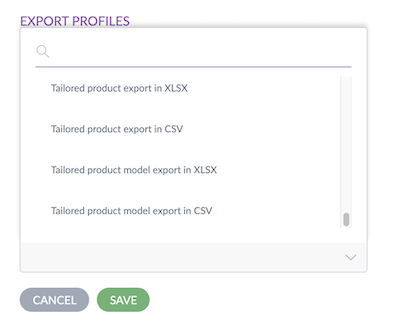
- Save your new export profile
Edit a tailored product export profile
Once you've created your tailored export profile, or if you want to edit an existing one:
- Go to Exports
- Click on the tailored export profile you want to edit
- Click on Edit located in the top right corner of the screen
Discover the different tabs of this profile
A tailored export profile is similar to a regular product and product export profile. The main difference is that you have a tab to configure the structure of your XLSX or CSV file.
Here are the tabs you can use:
- Properties: To define the label of your export profile.
- Permissions: To set permissions to allow specific user groups to execute or edit your export profile (Enterprise Edition only).
- Global settings: To define several settings: the maximum number of lines per file if you want to export the media (this will generate a file archive when exporting), the field delimiter (CSV format only), and the field enclosure character (CSV format only).
- Product selection: To use the provided filters to decide which products will be exported (read how to define your product selection).
- Export structure: To build your export structure (read how to define your export structure).
- History: To display the modifications by any user on your export profile.
To export the media, your export structure must include at least one source using an attribute like Image, File, or Asset collection.
If the attribute as main media used in your asset family has a value per locale and/or per channel, all of its media files will be exported.
Define your product selection
In the Product selection tab, you can select the products which will be exported. Filters are available to help you to refine your product selection. You can filter on family, category, status, completeness, data quality, or even insert a list of identifiers. You can also add new attributes to use them to filter your products.
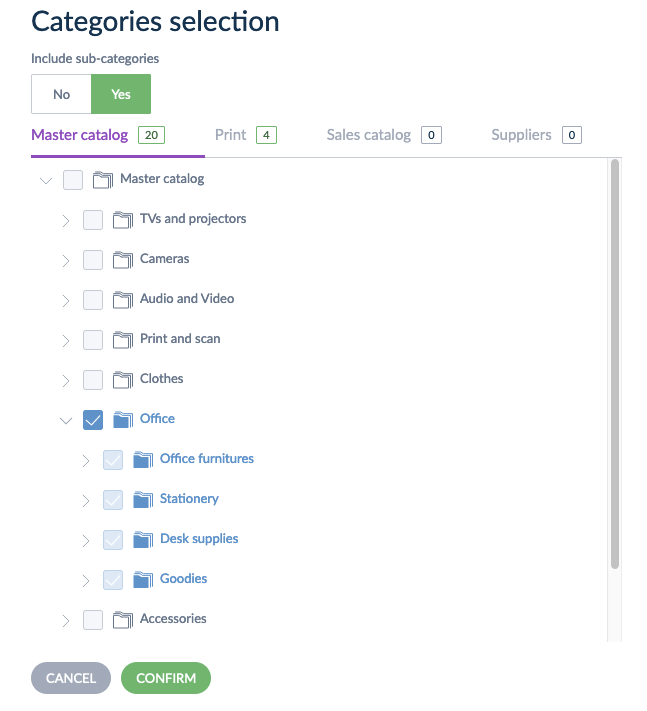
If no categories are selected, all products, including all unclassified products, will be exported.
Define your export structure
In the Export structure tab, you can build the structure of your file. You need to create the columns of your file, name them & link them to your PIM attributes, system properties, or association types for your export profile to be launched.
To do this, please follow the steps below:
- Add a first column by clicking on Add first column.
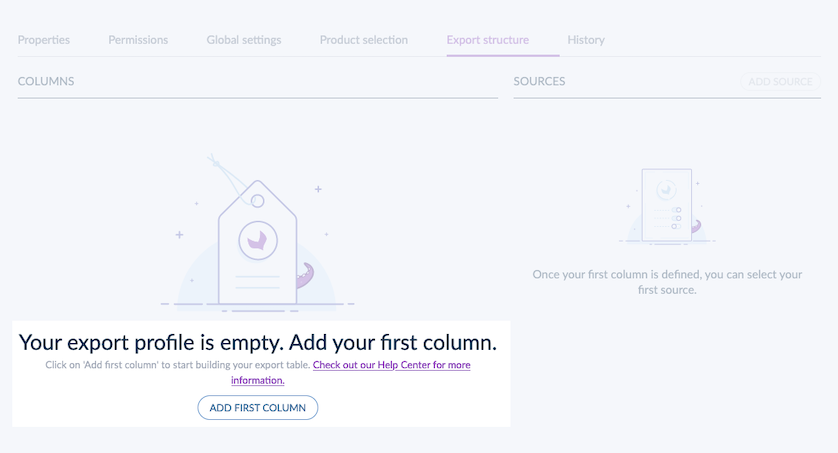
If you want to add columns in bulk from an Excel file, you can copy all the columns header in your spreadsheet and paste them in the last column created so that it automatically creates all your columns in your export.
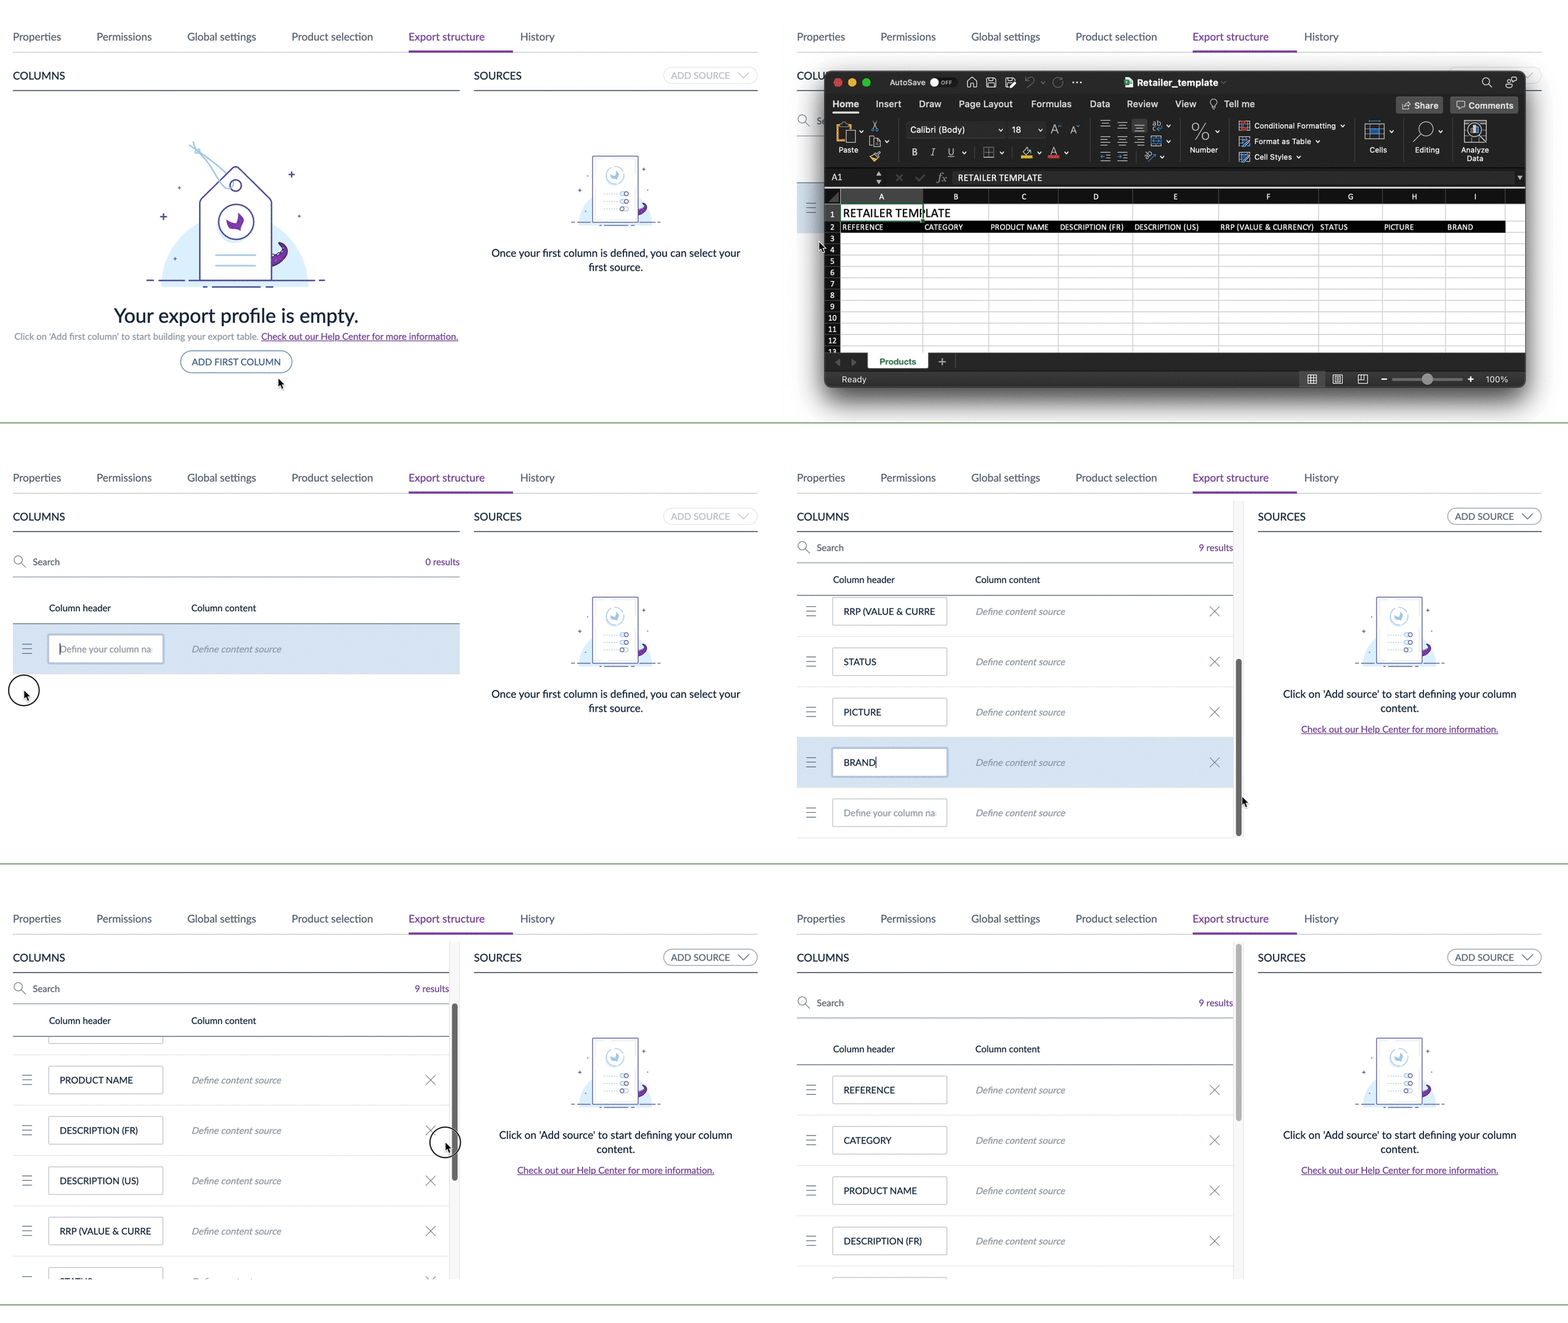
- Once your first column has been added, you can define the column name in the text field that just appeared.
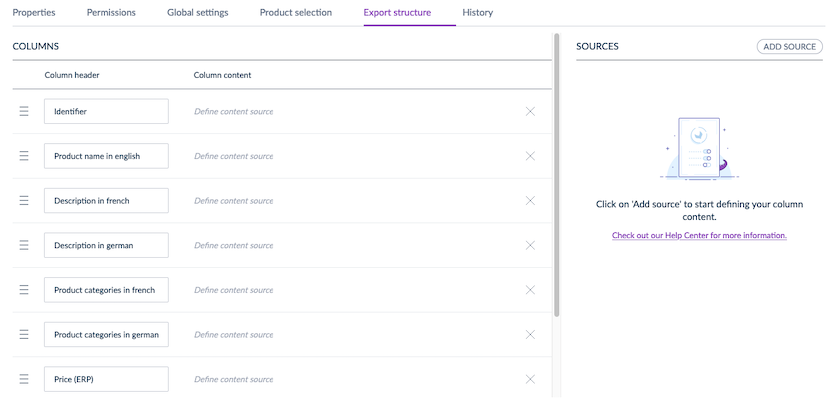
- Then, you need to add a source for each column, which means selecting an attribute, a system property, or an association type. To do this, please select the column you want, then, in the right panel, click on Add source and select any item from the list.
System properties are not set by default. Select only the system properties you need. You can choose: "Enabled", "Category", "Family", "Family variant", "Groups", "Parent", “Created” date, “Updated” date, and your association types.
- Once you've added a source, different options are available depending on the attribute you selected. If your attribute has a value per locale or channel, you may have to select from which channel and/or from which locale you want the data to be exported. But for some attributes, more options are available. For instance, you can choose between exporting the code or the label of the attribute option and which separator (comma, semi-colon, pipe) you want, when applicable.
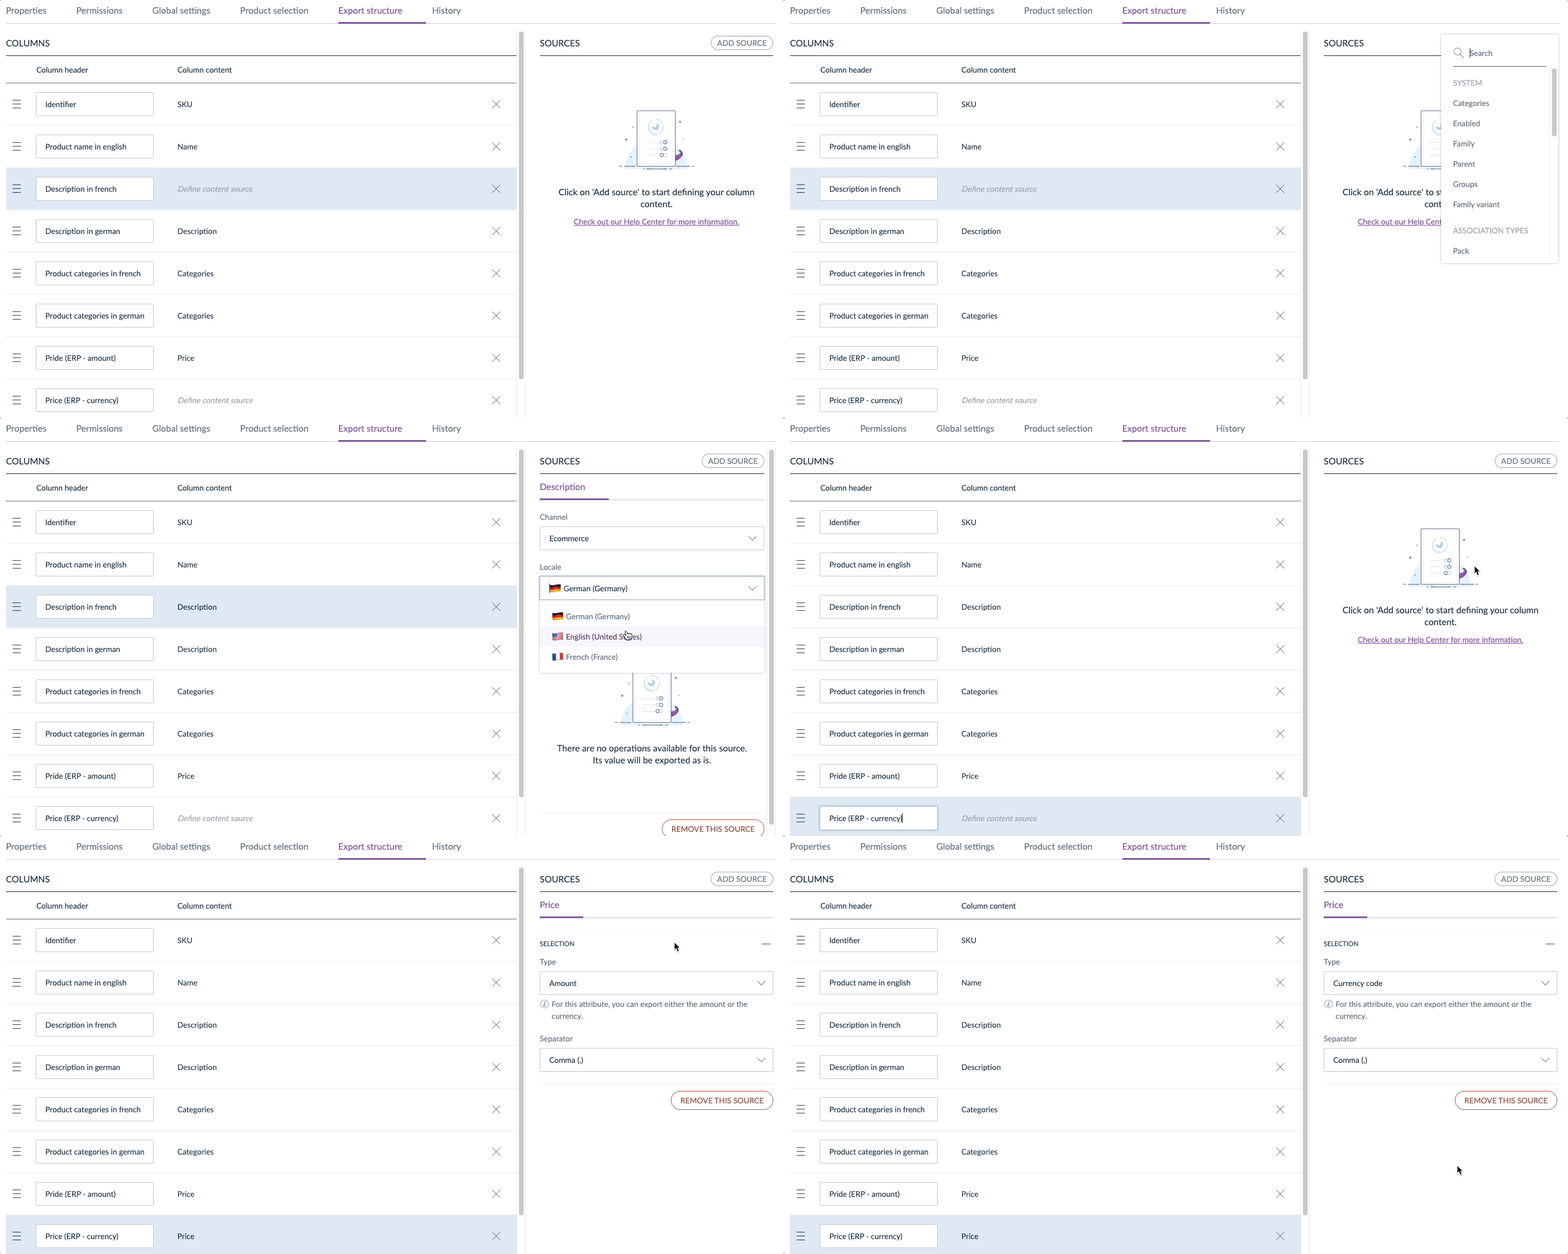
- Once you're done, click on Save in the top right corner.
- To launch your export profile, click on the name of your export profile in the breadcrumb, then click on Export.

Limitations have been set for each Tailored Export profile:
- Column headers must be unique.
- You can add up to 5,000 columns. Please be aware that configuring more than 1,000 columns may result in potential display issues in the PIM user interface.
- You can add up to 4 sources in a single column.
- You can add up to 10 text separators within a concatenation operation.
- Text fields are limited to 255 characters.
When selecting a reference entity attribute as a source, you have multiple choices:
- Either the code or the label of the record
- Either an attribute value used in the records, amongst the following: Text, Text area, Number, Simple select, and Multiple select.
For instance, if you selected the reference entity “Colors” as a source, you will be able to select the description attribute of the record linked to the products to be exported.
Discover operations
You can use operations to share the most meaningful values for your stakeholders by adapting your PIM values differently when exporting them.
To learn more about operations, please watch lesson 5 about Tailored Exports Operations.
Depending on the sources you define, here are the different types of operations you can add:
Yes/No replacement
Replace the default values with your value (only available for the "Yes/No" attribute or the "Enabled" system property).
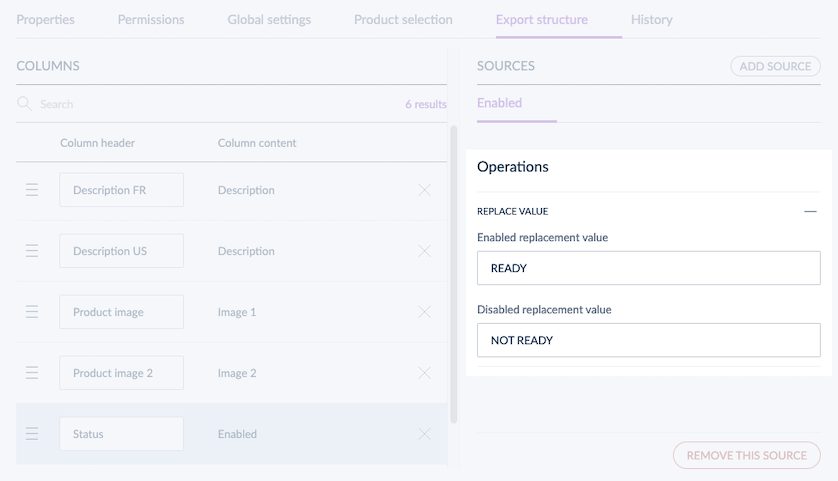
Replacement values are case-sensitive.
Replacement
Replace the values with your own (only available for simple select, multi-select, reference entities single link or multiple link attributes).
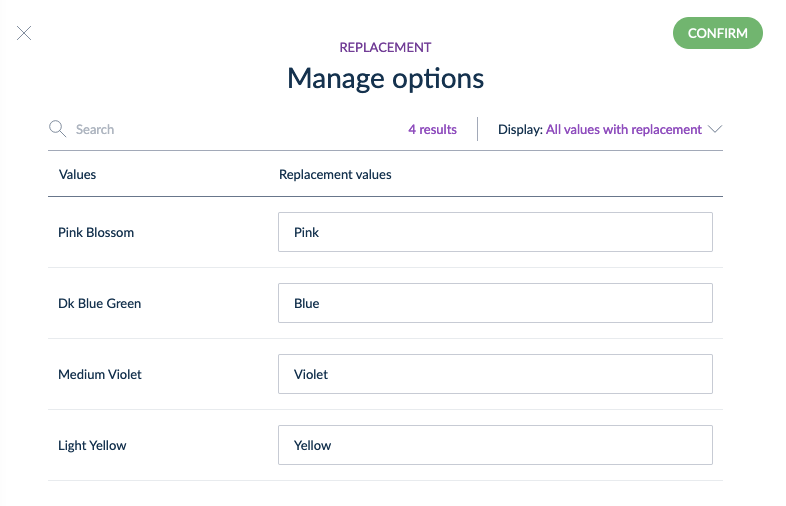
Replacement values are case-sensitive.
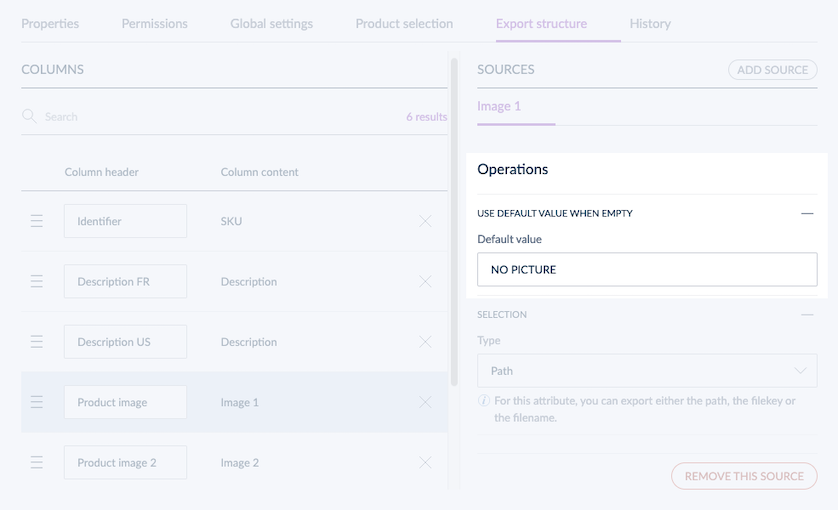
Use default value when empty
Define a default value when the source value is empty.
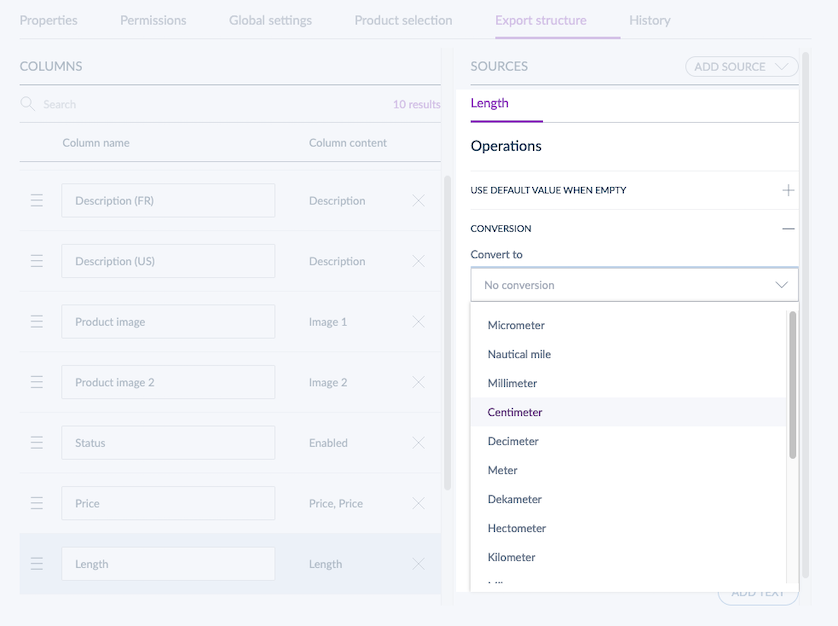
Conversion
Convert measurement units within the same measurement family (only available for measurement attributes used as a source).
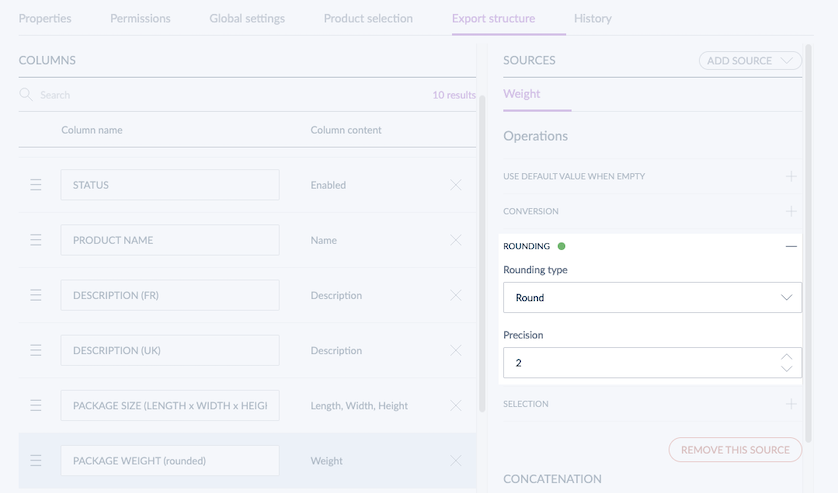
Rounding
Round measurement values, choosing from Round, Roundup & Round down, and define the number of digits - up to 12 - after the decimal separator (only available for measurement attributes used as a source).
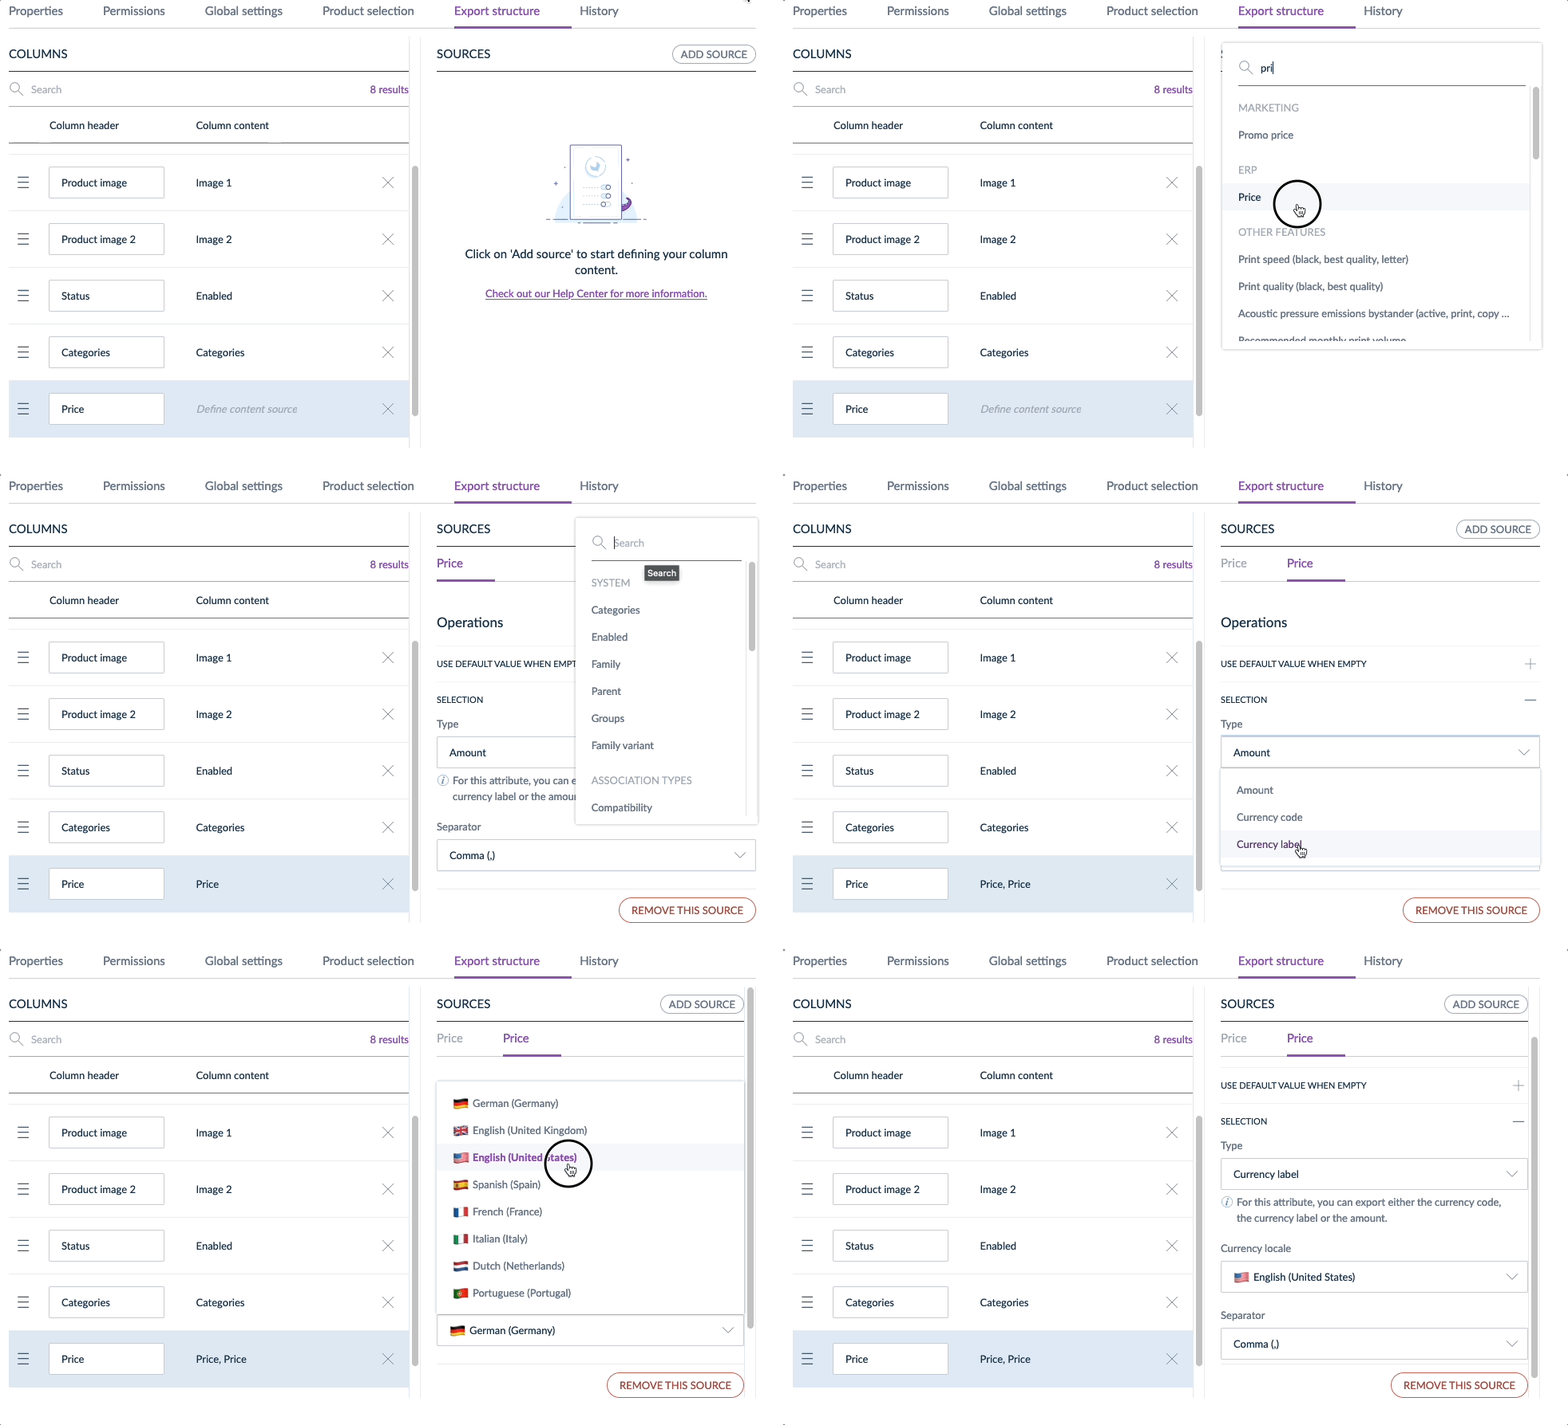
Concatenation
Concatenate different sources by displaying up to 4 per column. Click on Add text to add more details and create a separation between sources.
Clean HTML tags
Clean all the HTML tags automatically in your text attributes used as a source.
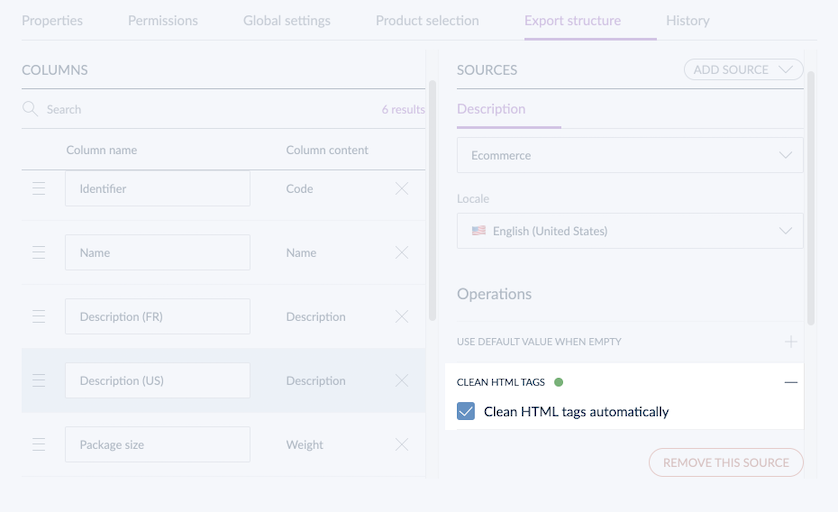
If you added a default value with HTML tags thanks to the Use default value when empty operation, and if you checked Clean HTML tags for the same source, this operation won't clean the HTML tags for the default value.
Selection
Select the format of the value you want to export. For instance, you can select the label, code, separator, etc. This operation will allow you to decide exactly what product information you want to export for each source.
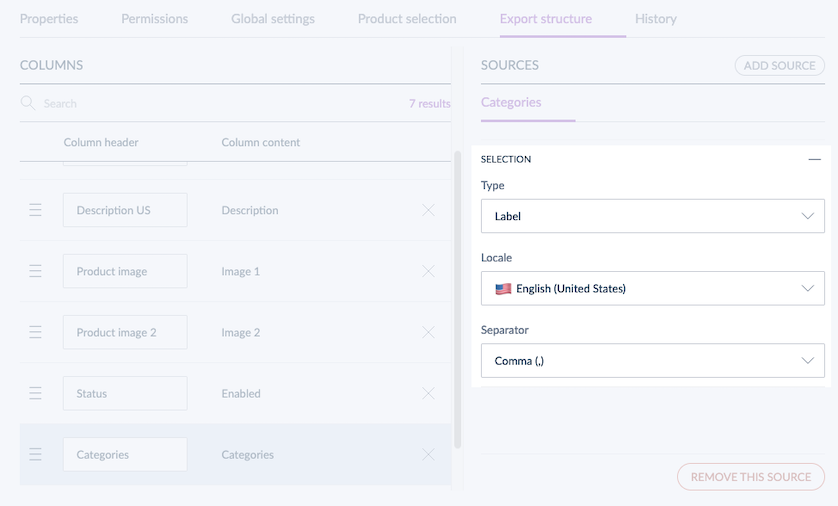
Decimal separator and Separator are two different options. The first one helps you to separate your figures with a dot, a comma, or the Arabic decimal separator. The second one helps you to separate a collection of values for the same attribute; for instance, if you export multiple assets, you can separate them with a comma, a semi-colon, or a pipe.
Duplicate a tailored product export profile
If you want to create another export profile based on an existing one, you can duplicate it. To do this, please follow the steps below:
- Select the export profile you would like to duplicate
- Click on Edit
- In the top right corner, click on the three dots "..." and select Duplicate
- Write a label and a code then click on Save


