Overview
You can configure your product export profile to only export the data you need, thanks to the Product Export Builder. This feature allows you to filter your export data on several products and system information.
If you are granted with the permissions, you can either create your own product export using the Product Export Builder or edit an existing product export profile.
The Product Export Builder feature is available for the product and published product export profiles (for the CSV and XLSX connectors).
It is also available for product model export profiles.
Create a new product export profile
To create a product export:
- Go to Exports
- Click on the Create export profile button
- Indicate a unique export code, an export label and select a job, for example: Product model export in CSV, Product export in XLSX or Published product export in XLSX (EE only)
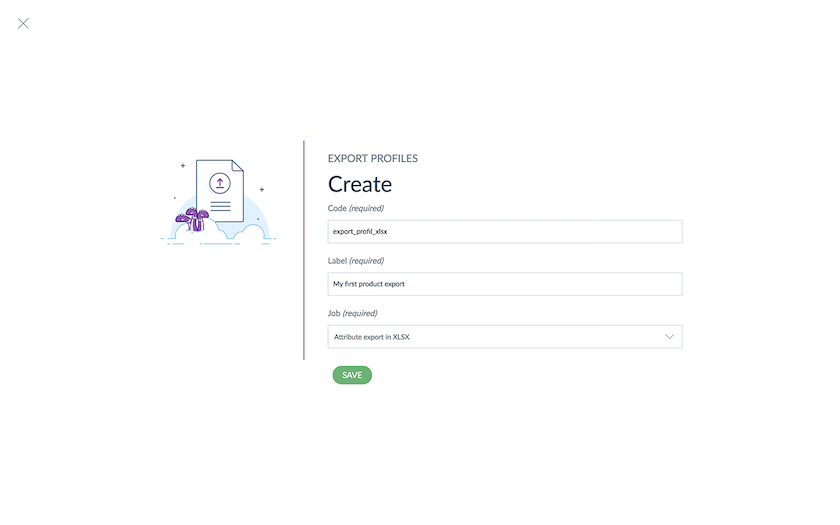
- Save your new export profile
The PIM opens the export profile in edition mode so you can customise it and select the information you want to export. You can start customising your own export profile to only export the data you need.
Edit a product export profile
From an existing product export profile:
- Go to Exports
- Click on the product export profile line you want to edit
- Click on Edit located in the top right corner of the screen
- Once the export profile is displayed, click on Content to edit the exported product information
From a newly created product export profile, click on Content.
Then, you will land on a page divided into two sections:
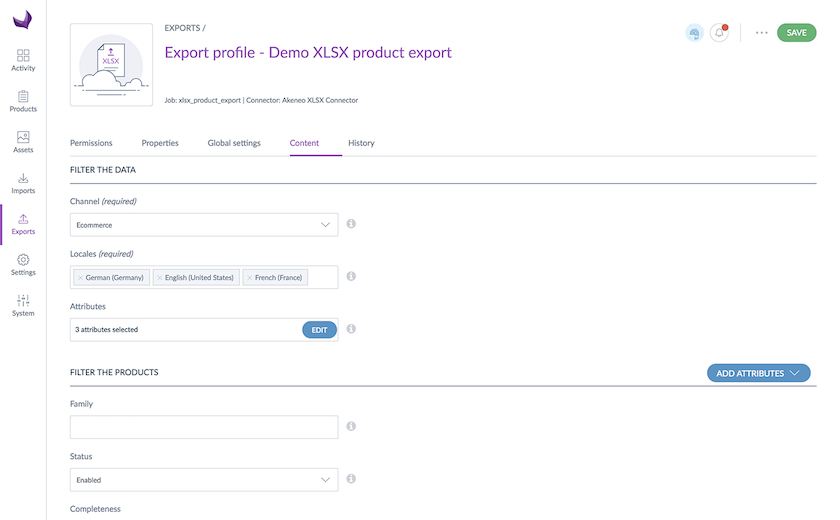
Filter the data: this part allows you to define the data of the exported file, namely its columns: you will have to specify a channel and one or more locales to export. Those are required fields. The last field Attributes will allow you to select the attributes that will be used as file columns.
Filter the products: this part allows you to filter your products on several product and system attributes such as family, category, status, completeness or even insert a list of identifiers. You can also add new attributes to use them to filter your products.
Filter the data
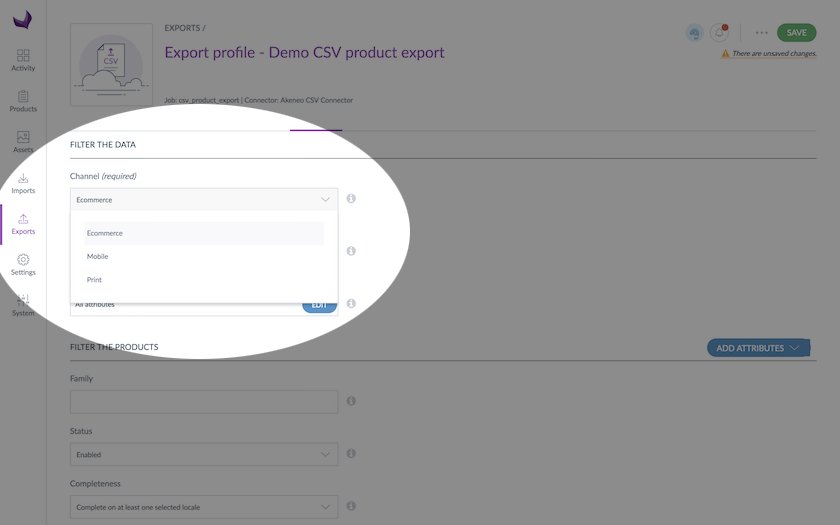
SELECT A CHANNEL
Each export can only be linked to one channel, please select the relevant channel containing the products you want to export.
SELECT ONE OR MORE LOCALES
By default, all activated locales for the channel you previously selected are exported. You can export product information for one or more locales depending on your needs.
For instance, Peter needs an export for his Spanish translator: he selects French and Spanish locales, the exported file the translator can enrich the product information for the Spanish locale based on the French product information.
REMOVE A LOCALE
Click on the small cross next to the locale code.
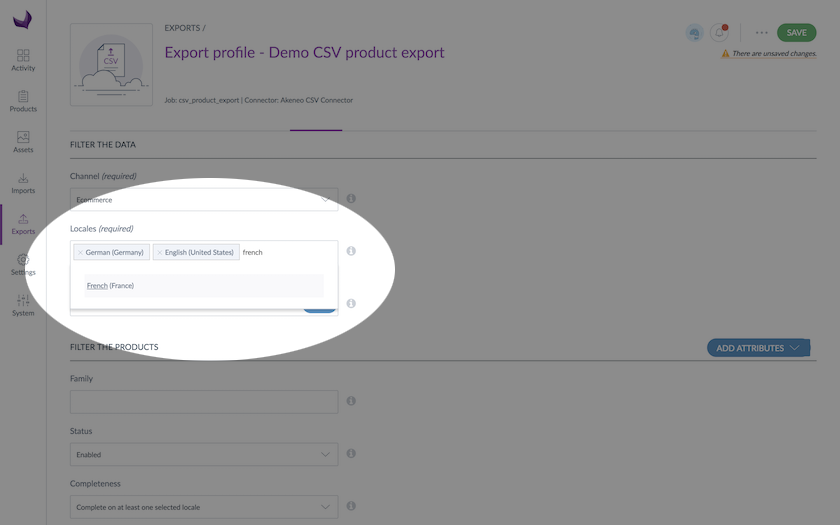
ADD A LOCALE
Start typing your locale code in the field, the PIM will automatically propose you the matching locales. Click on the locale to add it to the field.
SELECT ATTRIBUTES AS FILE COLUMNS
Click on the Edit button in the field to open the Attribute Selection pop-in:
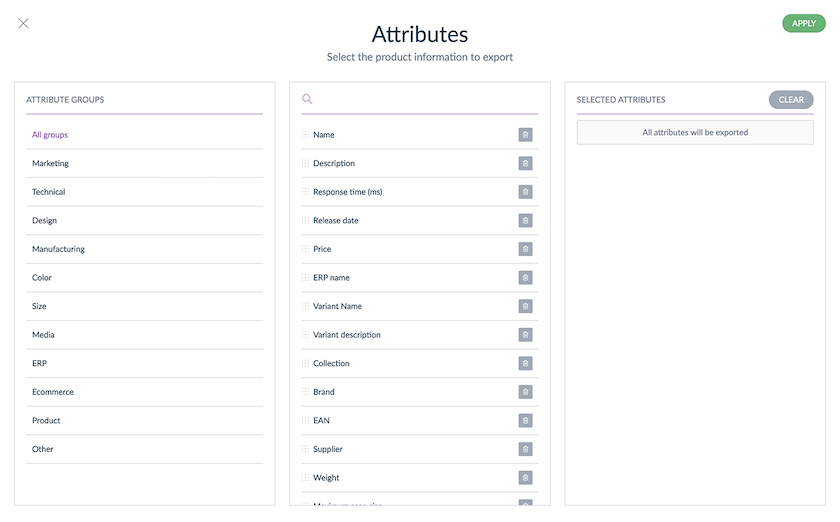
The pop-in is divided into three parts: the left part shows the attribute groups, the middle part displays the attributes belonging to the selected group, and on the right side, you will find your attribute selection. By default, note that all attributes are exported.
To make your own attribute selection, click on the left side to select a specific attribute group (or All groups to display all attributes). Place your mouse on your attribute and drag and drop it into the far right column. The selected attributes will be displayed as columns in your export file.
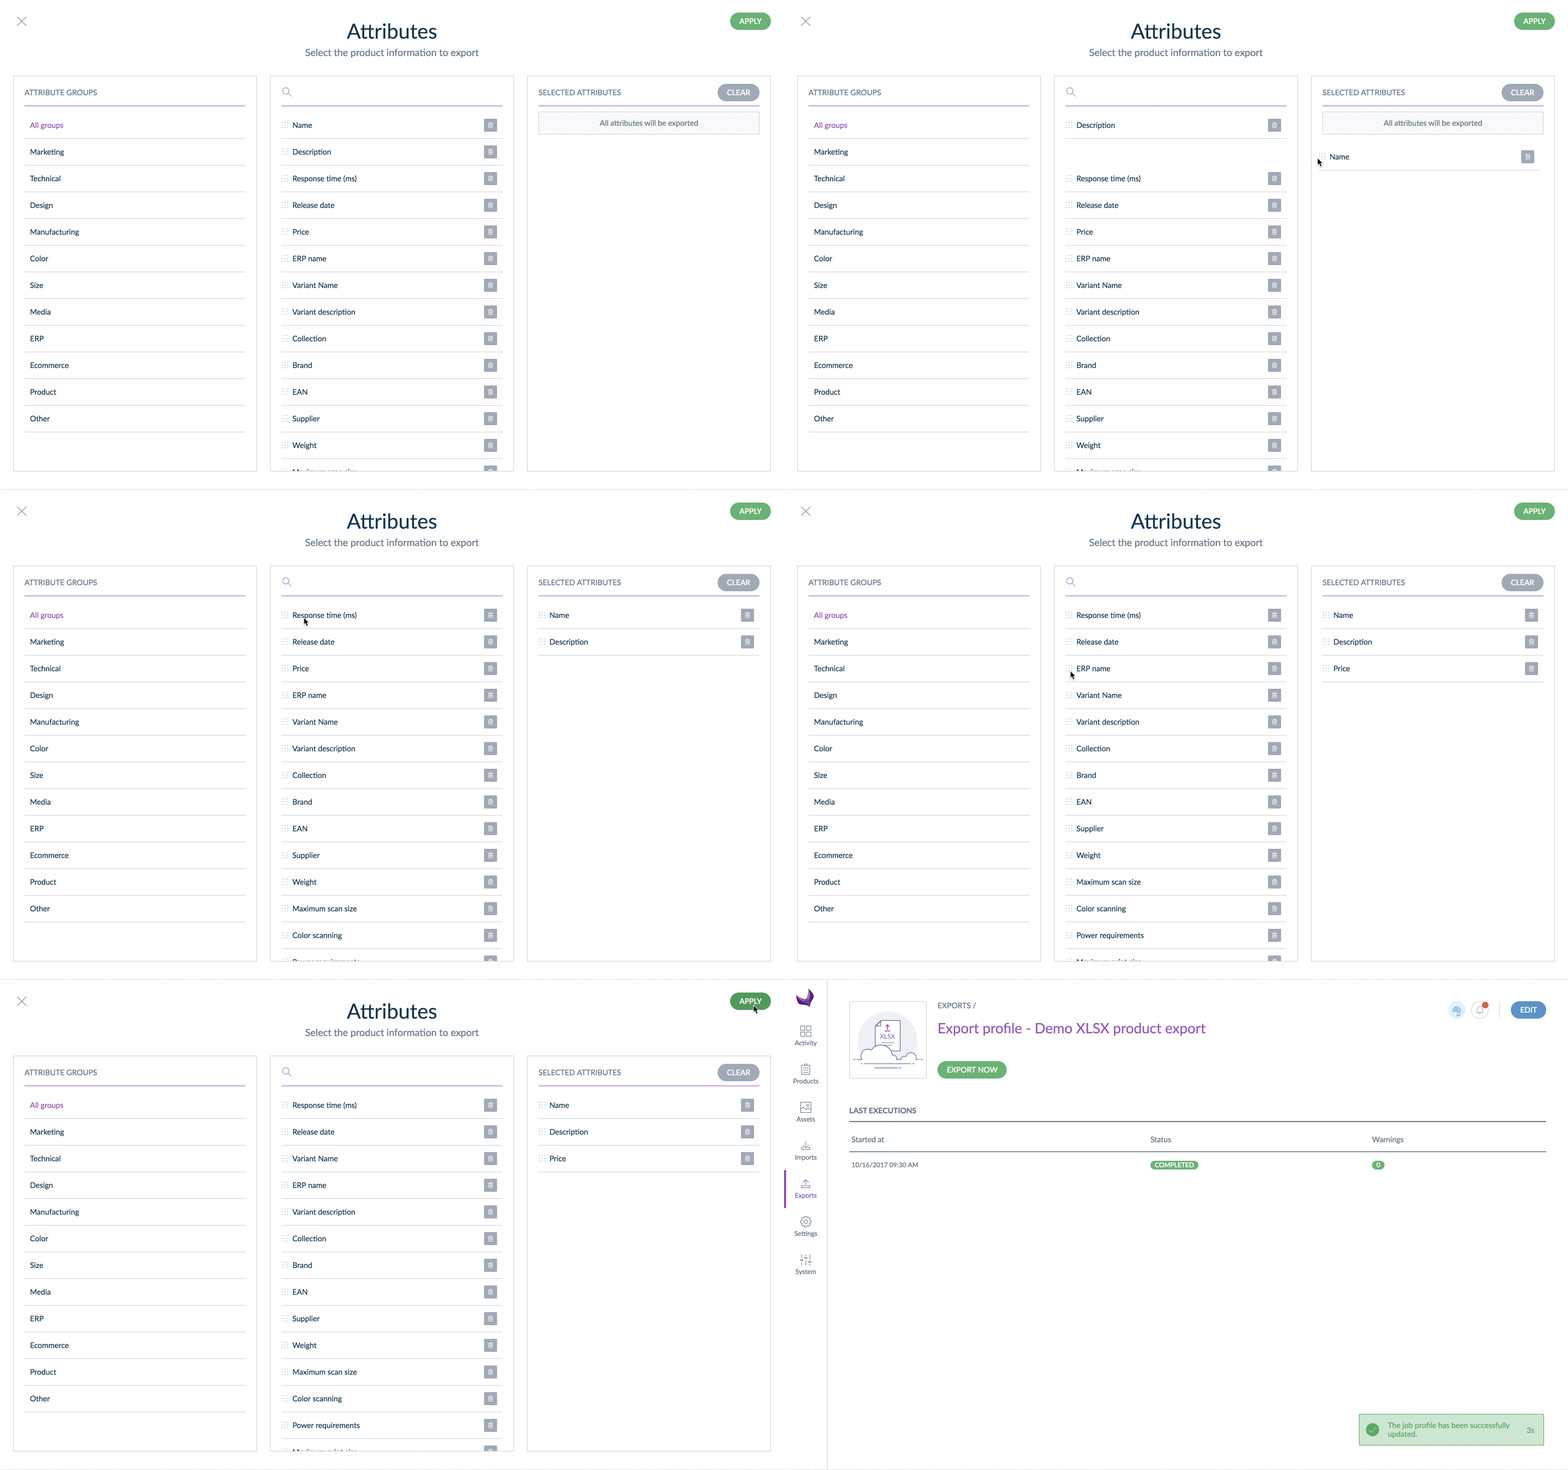
You can reorder your attributes by dragging them up and down. To clear your selection, click on Clear. To save your attribute selection, click on Apply.
The Attributes field will display the number of attributes selected for the export.
By default, the Identifier field is exported in the product export.
Filter the products
FILTER ON FAMILIES
By default, this filter is empty meaning that all products will be exported regardless of the family they belong to, products without families will also be exported.
ADD A FAMILY
If you want to export products belonging to specific families, click on the drop down list and click on the families you want to add in the field.
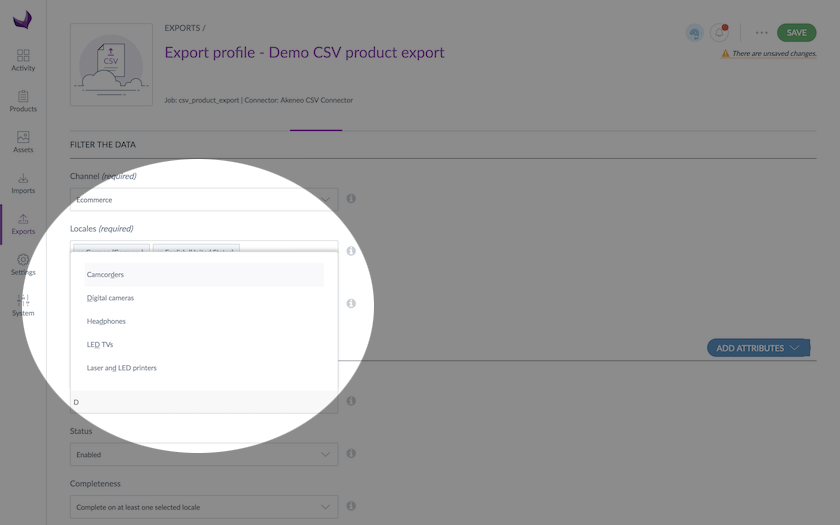
REMOVE A FAMILY
Click on the cross next to the family label to remove it from the field. Products belonging to this family will no longer be exported.
FILTER ON PRODUCT STATUS
You can also filter on the status of your products, three options are available:
- All: to export all products regardless of their status
- Enabled (default option): to only export enabled products
- Disabled: to only export disabled products
USE THE QUALITY SCORE FILTERS FOR PRODUCT EXPORT
The two drop-downs enable you to filter on the Quality Score to offer several options:
Quality Score
- No condition on Quality Score(default option): all products will be exported regardless of their Quality Score.
- A,B,C,D,E: select the score or scores you want to filter your product export on.
Export Quality Score(s) for:
- at least one locale: products will be exported if they match the selected quality score(s) for at least one selected locale
- all selected locales: products will be exported if they match the selected quality score(s) for all selected locales
You can reimport a product export file containing product quality scores. The product quality score columns will be simply ignored.
USE THE COMPLETENESS FILTER FOR PRODUCT EXPORT
The following drop-down enables you to filter on the completeness of selected locales. Four options on completeness are proposed:
- No condition on completeness: all products will be exported regardless of their completeness.
- Complete on at least one selected locale (default option): products must be complete in at least one locale
- Complete on all selected locales: products must be complete on all locales (if you have selected more than one locale).
- Not complete on all selected locales: products must not be complete on all locales (if you have selected more than one locale).
For instance, with 4 products and 2 exported locales fr_FR and en_US:
- Product A: complete in fr_FR, incomplete in en_US
- Product B: incomplete in fr_FR, complete in en_US
- Product C: complete in fr_FR, complete in en_US
- Product D: incomplete in fr_FR, incomplete in en_US
Exported products according to each completeness option for the locales fr_FR and en_US:
- Option 1: All products (A, B, C, D) will be exported
- Option 2: Only products A, B, C will be exported
- Option 3: Only product C will be exported
- Option 4: Only product D will be exported
USE THE COMPLETENESS FILTER FOR PRODUCT MODEL EXPORT
The following drop-down enables you to filter on the completeness of the product model children products for the selected locales. Three options on completeness are proposed:
- No condition on completeness: all products models are exported regardless of the completeness of their children products for the selected channel and locales
- At least one child product complete on one selected locale (default option): a product model is exported if at least one of its children products is complete for the selected channel on one of the selected locales
- All children products complete on all selected locales: a product model is exported if all its products are complete for the selected channel on all selected locales.
FILTER ON DATE
You can now export your products based on a specific time condition:
- No date condition (default option): no time condition will be taken into account for your product export
- Updated products over the last n days (e.g. 6): you only want to export the products that have been updated in the past ‘n’ days
- Updated products since this date: you only want to export the products that have been updated since a specific date
- Updated products since last export: you only want to export the products that have been updated since the last export
If you select Updated products over the last n days (e.g. 6), a field will be displayed near the drop-down menu. You can use it to specify a number of days (please only use numbers).
If you select Updated products since this date, click on the empty field to display the date picker and choose a date. To change the date, click again on the date picker. To completely remove a date, select another time condition.
Save export time and use this filter to only export edited products
FILTER ON CATEGORIES
In the export builder, you can also select the category(ies) of the tree you want to export.
For example, you want to export the clothing products (category Clothing in the tree) to mass update families because they have been refined and new families have been created for clothing.
By default all categories are exported. To select a category, click on the Edit button. The categories of the channel tree are displayed:
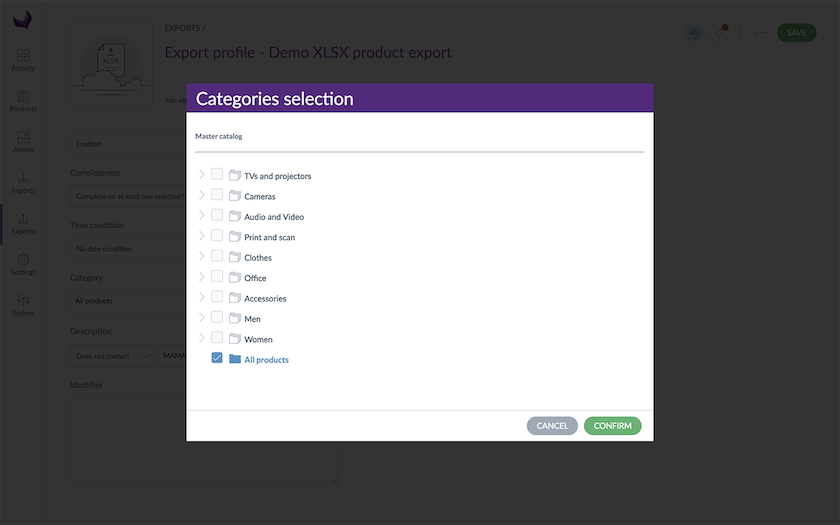
You can expand a category and see its subcategory by clicking on the arrow. This arrow also enables to collapse a category.
You can select a category and its subcategories, or only the subcategories.
Clicking on All products allows you to export all categories by erasing the above selection.
Only categorised and enabled products are exported, thus unclassified products will not be exported. If you want to export unclassified products, you can use the Quick export feature.
The category tree available in the export builder will be the tree linked to the channel selected above. If you want to export products belonging to another category tree, change the selected channel or edit the channel settings. Check the Manage your Channels article for more information about channels.
Filter on product identifiers
You can make a selection of the identifiers you want to export by adding them in the Identifier field. You can copy and paste a list of identifiers. They must be separated by a comma, a space or line breaks.
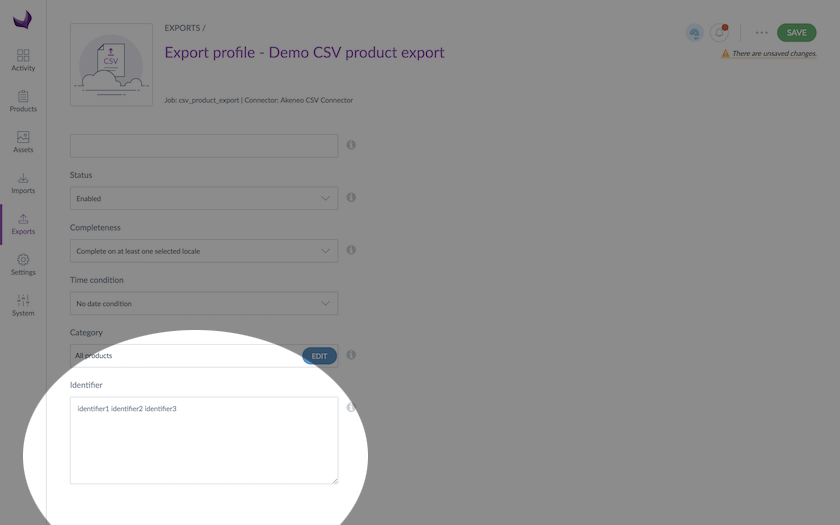
You can easily copy a list of identifiers from a .csv or .xlsx file and paste it in the identifier text area.
You can also ask for a selection of product models. Simply input their codes in the Identifier text area.
Filter on attributes
An additional Add attributes filter is available on the right side of the page. This drop-down menu allows you to add attributes as filters for the export.
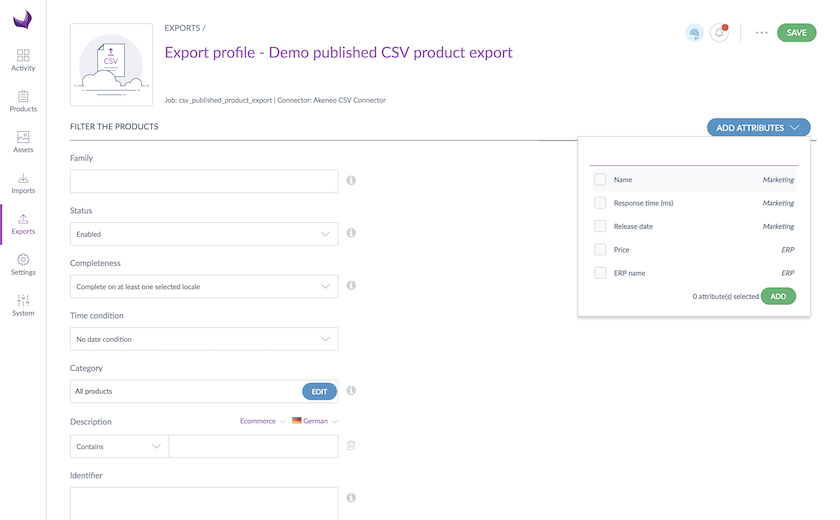
Select the attributes you’d like to use as filters. Once selected, they will be displayed in the Data filters area, above the identifier field.
For instance, you are working with a German translator, he needs to only work on products missing their German descriptions. You can create a filter on the description field saying:
Only export the products having no description for the German locale and e-commerce channel.
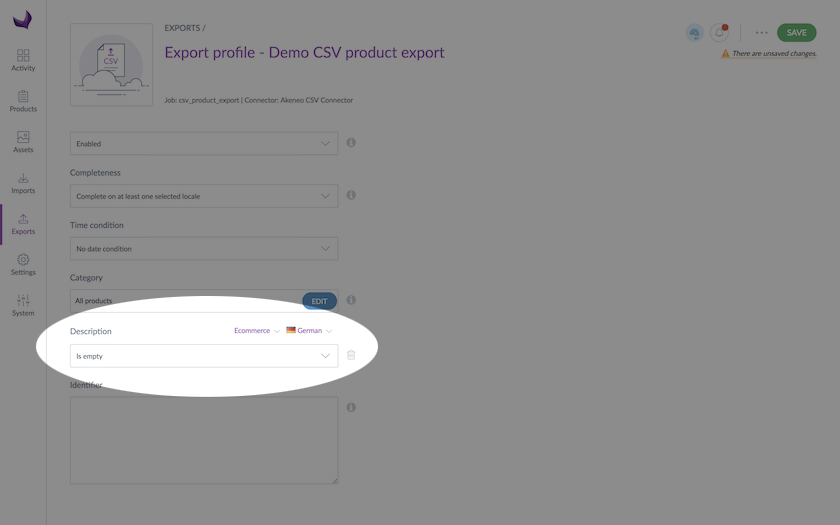
Each attribute comes with a list of operators, for instance for text area fields, the following operators are available:
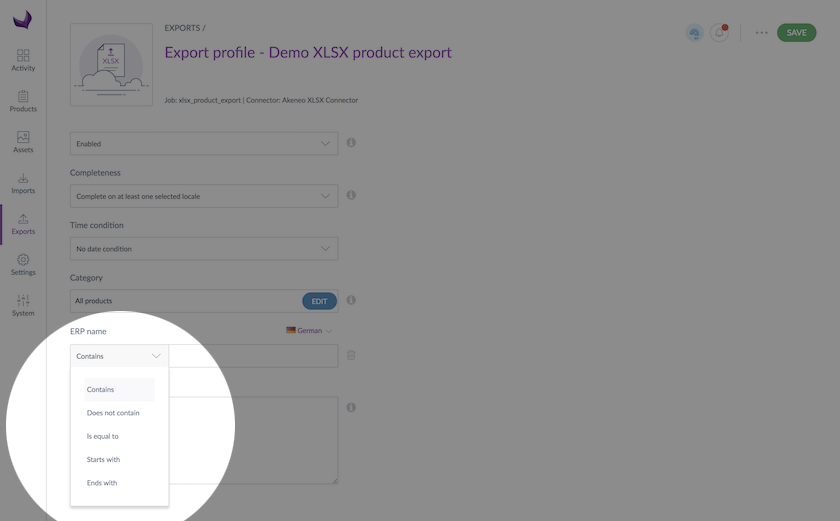
- To create a filter on an attribute, you do not need to have it as a column in your export file.
- All attributes created in the PIM can be used in the Product Export Builder.
- Any attribute can only be used once as a filter.


