Import your data
Overview
Importing data is pretty convenient, especially if you want to update your catalog with external sources: vendors, ERP, etc.
When importing data, Akeneo PIM extracts the data from the file and converts them to save in the PIM.
- The imports accept two types of files: CSV and XLSX.
- Imports are limited to 5GB per file.
- Import will only processes the first sheet of any uploaded XLSX file. It does not use the “Active” sheet or any other sheet beyond the first.
You can import product data, but also catalog entities such as the families, the categories, the attributes, etc.
Please note that Akeneo PIM is not case-sensitive. For instance, if you want to import two products with the following identifiers "A238B" and "A238b", as the PIM doesn't differentiate the uppercase "B" from the lowercase "b", a first product “A238B” will be created and will then be updated to “A238b”.
Steps of an import
The file import process is straightforward. It consists of the following:
- Creating an import profile (see below for more information about it)
- Building the file, manually or via a third-party application
- Uploading this file in the PIM or enabling the PIM to fetch this file on a given path (this last option is not available in the Serenity offer)
- Launching the CSV or XLSX file import
What is an import profile?
An import profile allows performing imports in the PIM. This profile format is based on the following:
- A code to identify the import profile
- A job to define what will make the import when executing. For instance, is it a product import in XLSX file or a category import in CSV
- A set of configuration fields, available as a form in the PIM. Each import profile can have its configuration.
Browse import profiles
To view the available import profiles:
- Log in with a user account with the permission to View the list of profiles for imports
- Go to the Imports menu
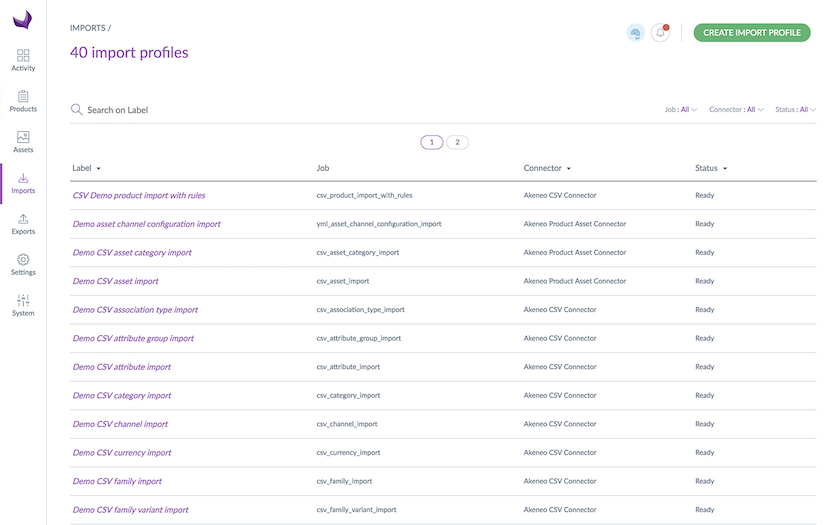
- To narrow down the list of displayed import profiles, use the available filters above the grid or the search bar that will search on the label
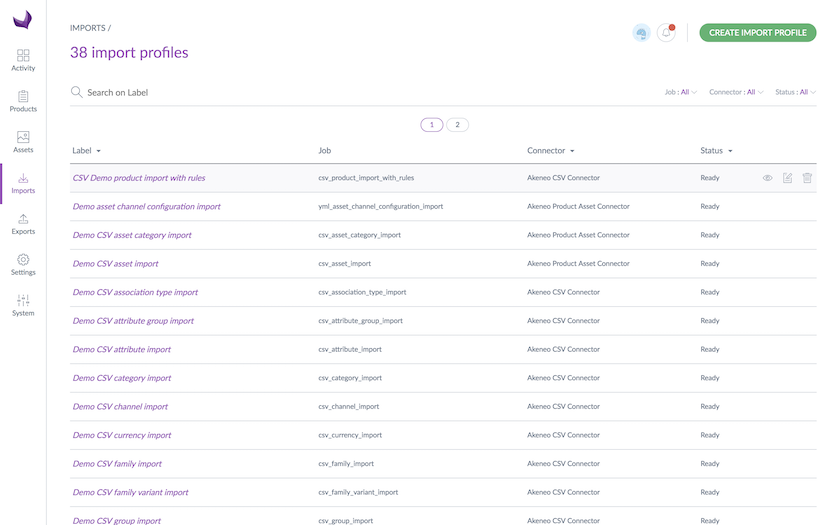
To see the information on a given import profile, click on its row in the grid.
Create a new import profile
To create a new import profile:
- Log in with a user account with Create an import profile permissions
- Go to the Imports menu
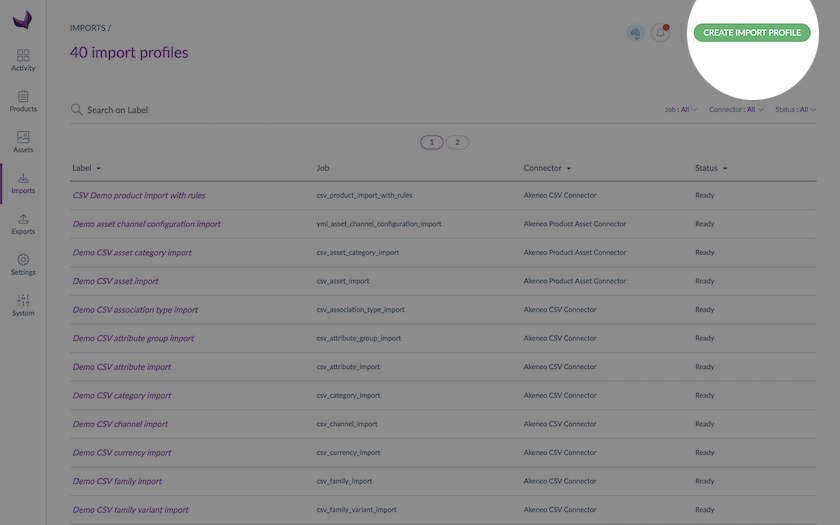
- Click on Create import profile
- All fields in the pop-up window must be filled in:
- A unique code
- A label to identify the profile more easily
- A job according to what you wish to import
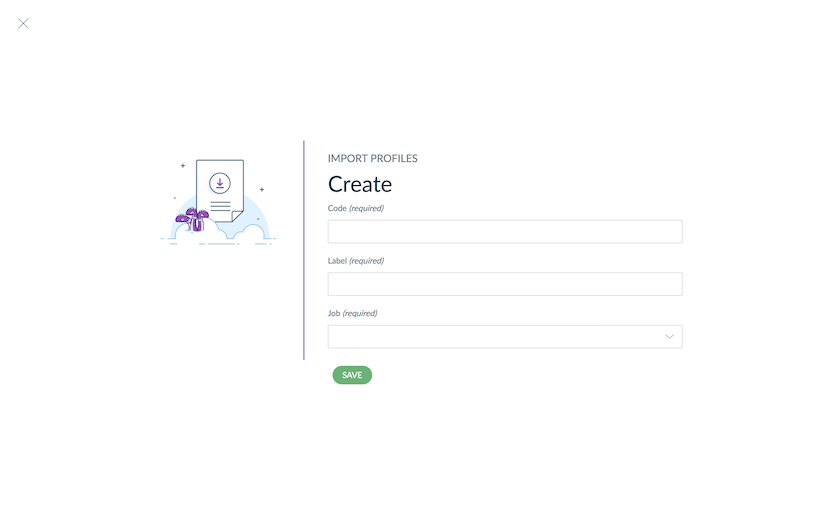
- Click on Save to finalize your import profile creation. The profile page screen is displayed. You can then configure it.
Update an import profile
To update an import profile:
- Log in with a user account
- Go to the Imports menu
- Click on the import profile that needs to be modified
- Click on the Edit button
- Make your changes
- Click on Save to update the profile
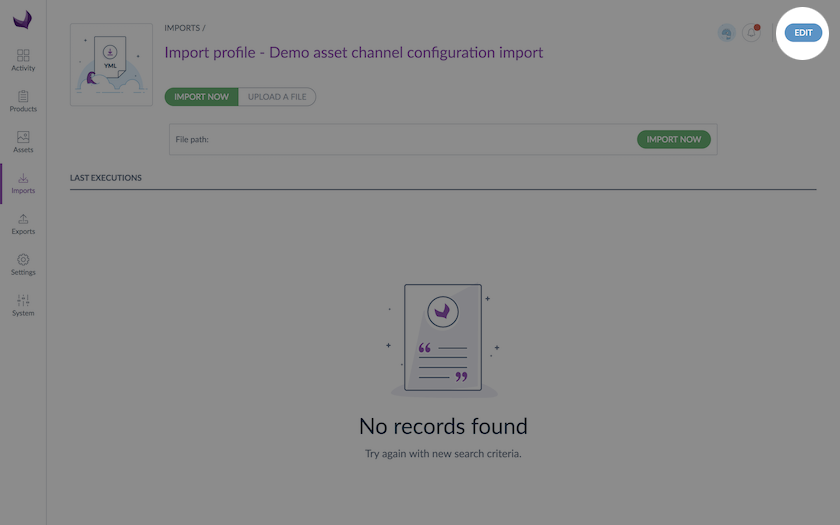
In the Properties tab, you can edit the label of your profile.
In the Global settings tab, properties depend on the import job. For example, for the CSV product import, you will find the following properties:
| Property | Details |
| File path | Defines the path of the file to import in case you want the PIM to automatically fetch the file for you (Not available in Serenity offer) |
| Allow file upload | Allows file upload from the specified file path in case you want the PIM to automatically fetch the file for you (Not available in Serenity offer) |
| Delimiter | Defines the character to delimit the fields in the file (semi-colon, comma...) |
| Enclosure | Defines the character for the field enclosure in the file (“) |
| Decimal separator | Defines the character used as decimal separator in the imported file (for instance, a dot, a comma..) |
| Date format | Defines the format used for dates in the imported file (for instance, yyyy-mm-dd, mm/dd/yyyy...) Please note, if you import an XLSX file containing formatted date, make sure to configure your import with the "yyyy-dd-mm" date format, independently of the display format defined in your file. |
| Enable the product | Defines the default status to create a product in Akeneo: - status “enabled” if yes - status “disabled” if no |
| Categories column | Defines the column name for categories in the imported file |
| Family column | Defines the column name for family in the imported file |
| Groups column | Defines the column name for groups in the imported file |
| Compare values | Enables the comparison between original values and imported values It can speed up the import if imported values are very similar to the original values |
| Real time history update | Enables the update of the product history It can be switched off to improve performances |
| Enable options creation | Automatically creates missing attribute options during product/product model creation or update. This only works for simple select and multi select attributes that have the “Enable option creation during import” property enabled. |
If a user has no rights granted to modify an import profile due to his role(s), then the permissions which he may benefit from due to his user group(s) (EE only) will not be applied. For instance, if a user does not have the Edit profiles of imports permission, his Enterprise Edition rights to edit a specific import profile will be ignored.
Select your import mode
For users seeking greater control over their product data imports, an import mode selection is available. It offers increased flexibility with three import modes:
- Create or update: allows updating existing products and creating new ones.
- Create only: allows creating new products while skipping updates.
- Update only: allows updating existing products without creating new ones.
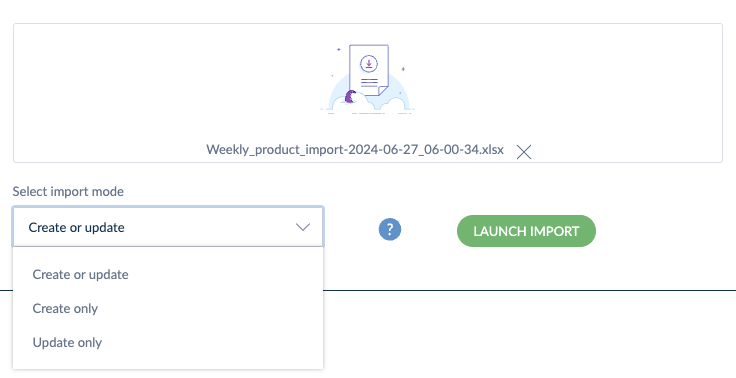
The import mode selection is only available for the following jobs:
- Product import in XLSX
- Product model import in XLSX
- Product import in CSV
- Product model import in CSV
- Product import with rules in XLSX
- Product import with rules in CSV
- Product model import with rules in XLSX
- Product model import with rules in CSV
- Tailored import in XLSX
- Tailored import in CSV
The availability of these three options depends on the user role permissions. For instance, if a user does not have permission to create new products, the “Create only” option will not be available in the import mode selection. This ensures that users only see the options relevant to their access level, maintaining security and control over product data management.
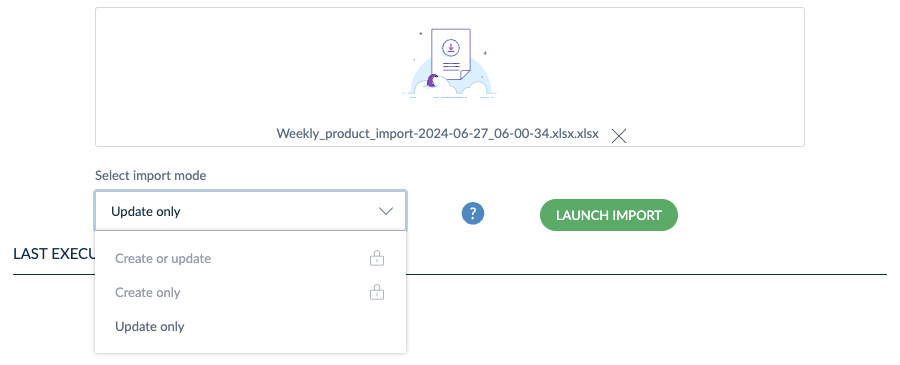
Even if a user does not have the role permission to Edit attributes of a product or to Edit attributes of a product model, they can still make significant changes through an import file.
Specifically, users will still be able to add products to groups, create associations for these products, and change the product status. This means that while attribute values remain protected, other aspects of the product data can still be modified.
Import images & files
If you have Image and/or File attribute types in your families, you can import their content directly via the product import profile. To do this:
- First, export the relevant product or product models via an archive.
- Then, configure the archive to modify the product/product model file by adding your images and/or files.
- Finally, import back the new archive in the PIM.
Export the relevant products or product models
- From the left menu, click Exports
- From the top right corner, click Create, type a label and a code and select the job Product export in XLSX or product model export in XLSX
- Under Global settings, switch Export files and images to Yes
- Under Content, select the relevant Image or File attributes
- Save and click Export
- Once the job is finished, click on Download generated files and get the archive
Configure the archive
- Open the archive you just downloaded
- Open the Files folder
- Each folder under Files corresponds to a product or product model and their names are the SKUs or codes of your product or product models
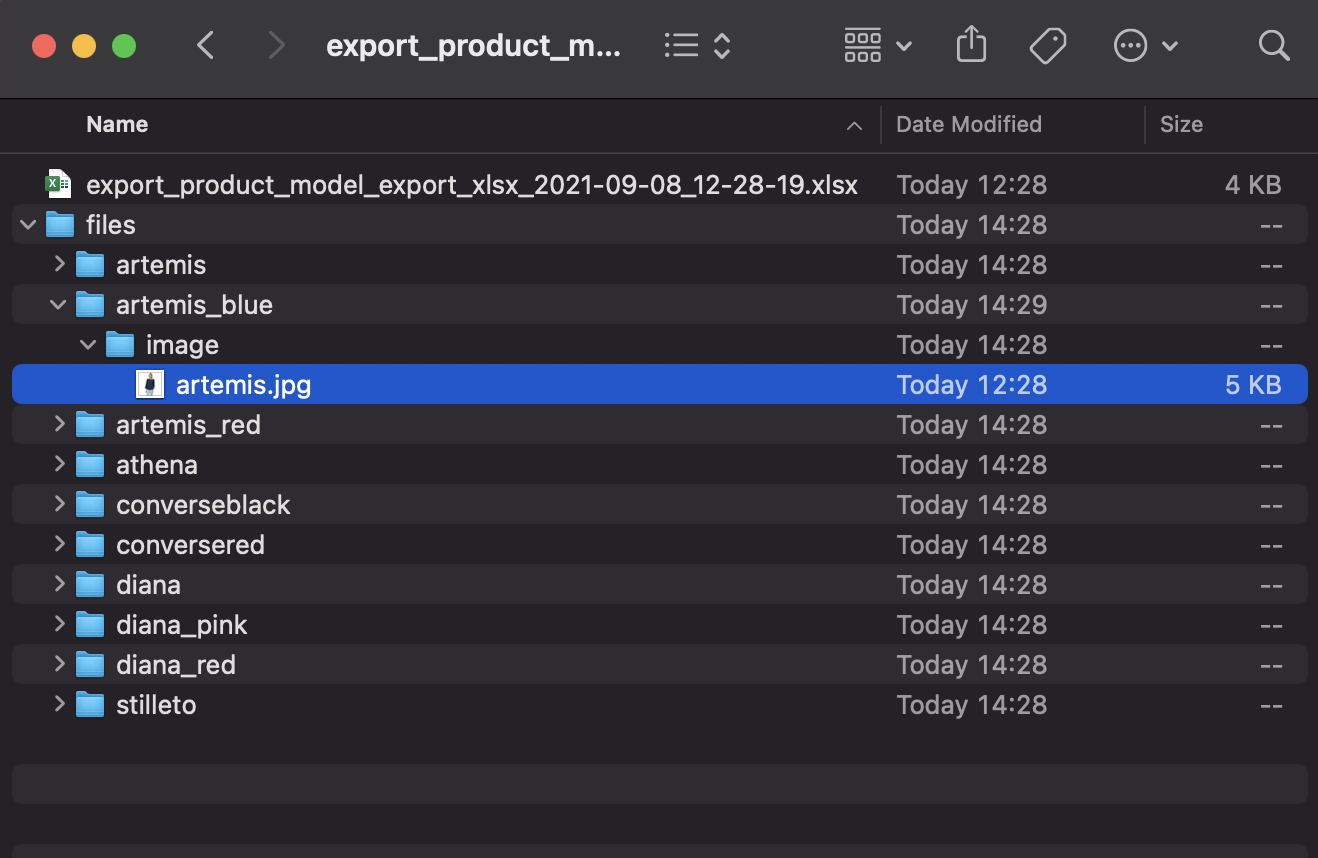
- To add new images or files, click on the relevant folders, open the folders, and add your image to each one.
- Once done, open the CSV or XLSX files corresponding to your products or product models.
- Go to the columns corresponding to your image or file attributes
- Change the filenames of the images or files corresponding to the name of the images of files you added in the previous steps.
- Save your spreadsheet
- Select the spreadsheets and the folder File simultaneously and create an archive.
Product identifiers that contain spaces or special characters may cause issues during file import. Indeed, the file paths generated with these identifiers won't be reimported. Please modify the identifiers to remove any spaces or special characters to ensure full compatibility with the system.
Import back the new archive
- From the left menu, click Imports
- Select the export profile named XLSX product import
- Upload your archive and click Import
You're done 😃
You can't import back the archive you just downloaded from the PIM. To learn how to do this, please first read how to configure it, then read how to import it.
Duplicate an import profile
If you want to create another import profile based on an existing one, you can duplicate it. To do this, please follow the steps below:
- Select the export profile you would like to duplicate
- Click on Edit
- In the top right corner, click on the three dots "..." and select Duplicate
- Write a label and a code, then click on Save
Download and upload an import profile
To copy an import profile from one instance to another (e.g., from a staging instance to a production instance), you can download the existing profile’s configuration and import it into a new profile on the other instance.
Download an Import Profile Configuration
- Select the import profile you want to copy.
- Click on Edit.
- In the top right corner, click on the three dots (”…”) and select Download Profile Configuration.
Upload the Profile Configuration to Another Instance
- Create a new profile in the other instance.
- Click on Edit.
- In the top right corner, click on the three dots (”…”) and select Import Profile Configuration.
- Upload the configuration file you downloaded earlier.
This is only possible with Tailored import profiles.
Please note that permissions and properties are not included in the configuration you download and import.
Run an import
How to start an import:
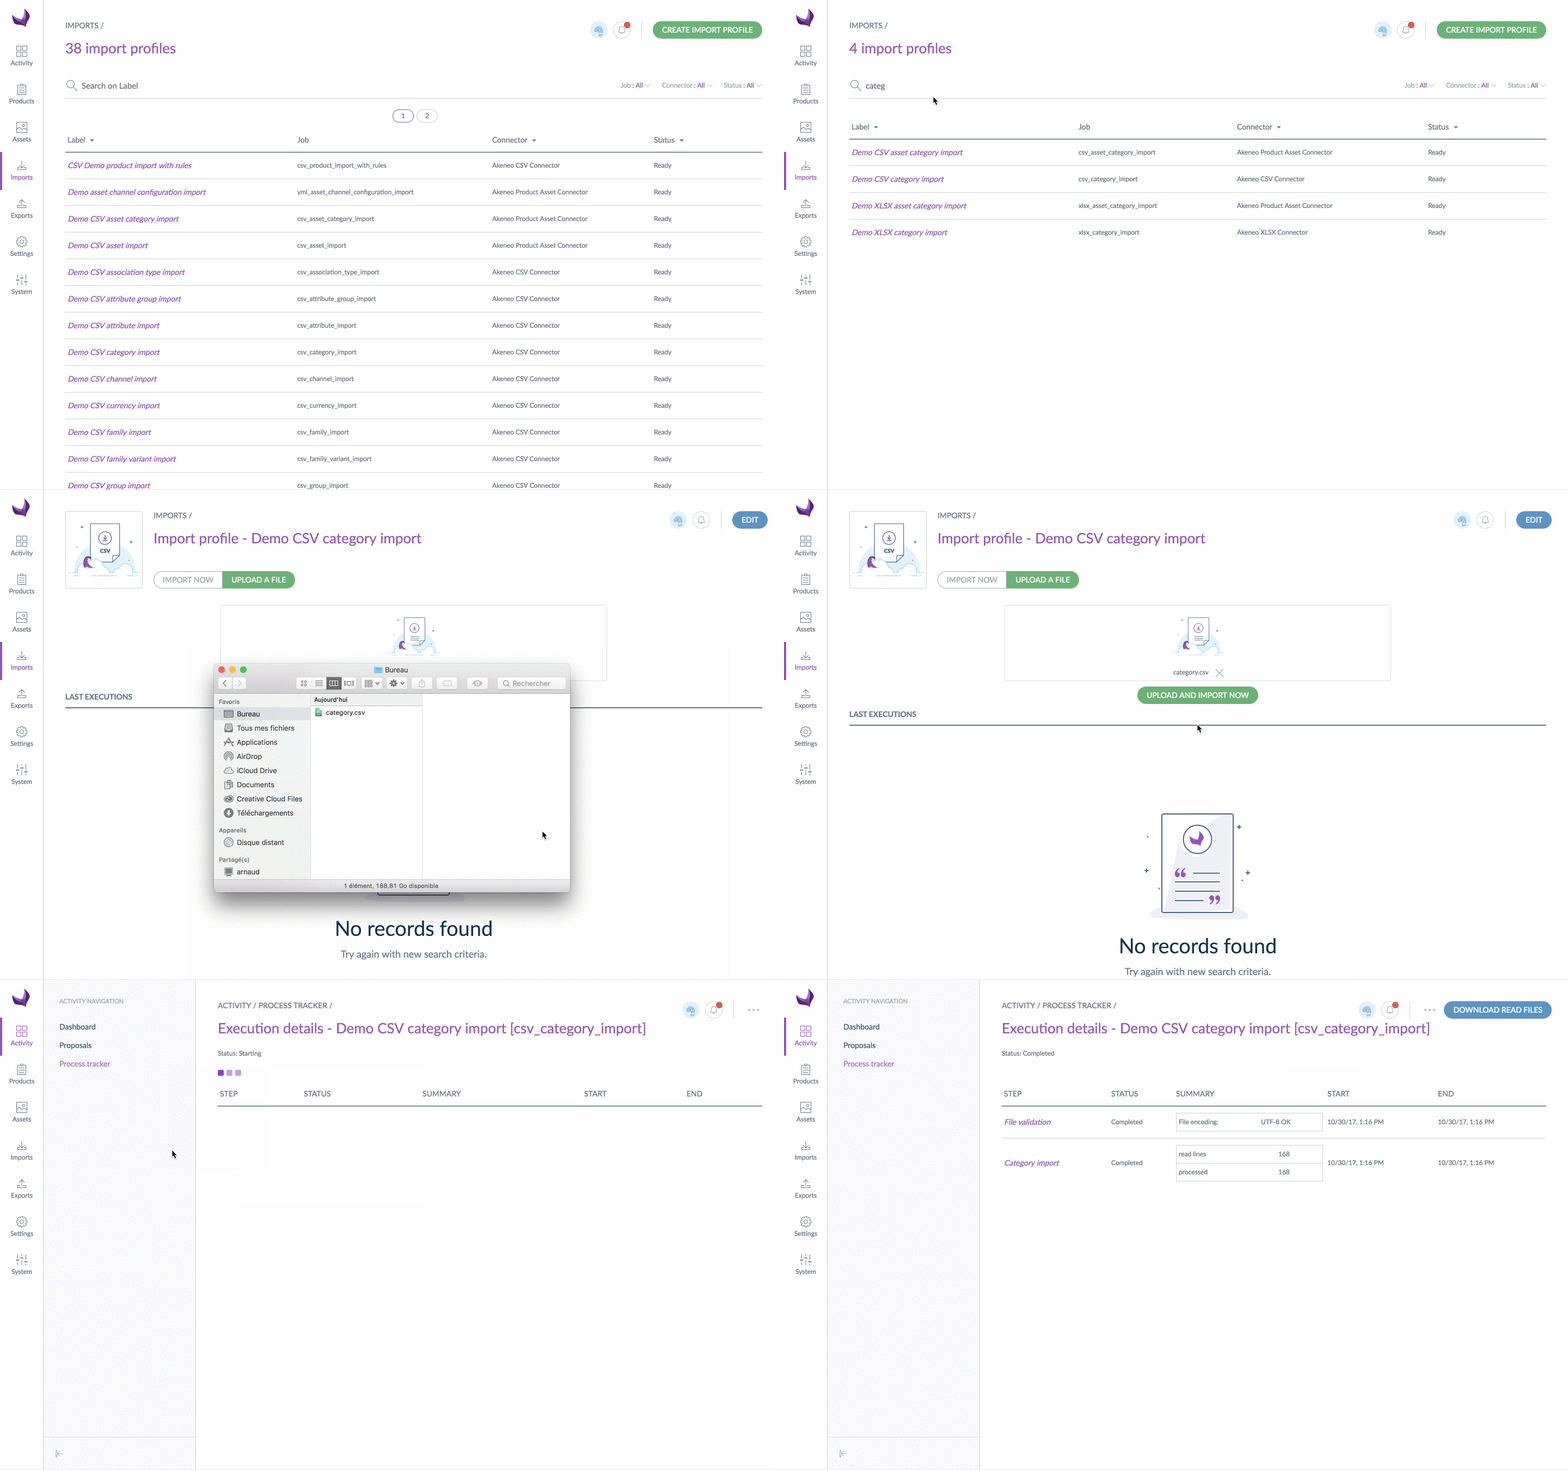
- Go to the Imports menu to see the list of the import profiles available.
- Select the import profile you want to execute, then click on the relevant line.
- The page for the import profile is prompted. Click on Import now if you want the PIM to fetch the file in the path you gave in your profile configuration. Or click on the Upload a file button to upload a file yourself.
- The page of the import execution is displayed. The page refreshes continually to let you know at what stage the import is.
When the import ends, a notification is available on the top right corner of the PIM.
An email can also be sent depending on your user configuration. For further details, please refer to the Manage your account article.
With the user groups rights (EE only)
Rights on the product information
In the case of product imports, the PIM takes into account your permissions based on the user groups you are in:
- you own the products of the Clothes category; if you try to import product information for these products, the import will directly update your products
- you only have edit rights on the products that are in the Audio video category; if you try to import product information for these products, the import will automatically create a draft for you, as you cannot directly update these products
- you only have a view right on the products that are in the Goodies category; if you try to import product information for these products, the import won't work for these products, and you will receive errors saying that you cannot modify these products
To know more about how the rights on product data work in the PIM, look at the Access rights on products article.
Rights on import execution
The permission to execute imports can be customized for each import profile. So if you cannot launch an import, be sure that you have the right to run it in the Permissions tab of your import profile in edition mode. See the Access rights on imports/exports article for more details.
If a user’s role does not include permission to modify product families, the user will be restricted from editing product families directly within the user interface. However, please note that the same user will still be able to modify product families through an import.
We recommend reviewing role permissions and import configurations to ensure proper access control and compliance with your data governance policies.
Main identifier and UUID
We recently introduced the possibility of having up to 10 identifier attributes in the PIM. By default, the main identifier is the ‘SKU.’ You can also set any other identifier attribute as the main identifier for your whole catalog: the SKU will then act as an additional identifier in the PIM.
The main identifier, along with the UUID, is the reference for imports. You can either use both in your imports, or each of them. Please find below the different use cases for your imports.
Please note that you can not change the main identifier for your whole catalog when using an import file. If you would like to transition from ‘SKUs’ to ‘EANs’ for example, go to your PIM > Create a new identifier attribute > set it as the ‘main identifier’ on its settings page.
New import processes with the UUID
Please find the following use cases when running imports:
- You can create a product with no main identifier & no UUID: a new product will be created, and a UUID will be randomly assigned.
- You can create a product with a main identifier and no UUID: a new product will be created with this identifier, and a UUID will be randomly assigned.
- You can update a product only with its UUID: it will be updated even if the main identifier is unavailable.
- You can update a product only with its main identifier: the product will be updated even if the UUID is unavailable.
- You can update the identifier of a product using its UUID: the product will be updated with a new main identifier.
- You can create a product with your own UUID: you can generate a v4 UUID anywhere (on this website, for ex.) and add it during the product creation process.
The UUID column is hidden by default. If you want to display this column, Update your export profile and activate 'With Product UUID' before running your export.
Here is the table listing all use cases depending on what you fill in the UUID and main identifier columns:
| uuid | main identifier | family | use case | result |
| EAN-ex01 | tshirt | Existing product | Update product having EAN = EAN-ex01 | |
| EAN-new01 | tshirt | New product | Create product with generated uuid and main identifier = EAN-new01 | |
| tshirt | New product | Create product with generated uuid and no main identifier | ||
| uuid-0001 | EAN-ex02 | tshirt | Existing product | Update product having uuid = uuid-0001 |
| uuid-0002 | EAN-new02 | tshirt | New product | Create product with uuid = uuid-0002 and main identifier = EAN-new02 |
| uuid-0003 | tshirt | Existing product | Update product having uuid = uuid-0003 and no main identifier | |
| uuid-0004 | tshirt | New product | Create product with uuid = uuid-0004 and no main identifier |
Please note that the UUID can’t be modified once the product is created.


