


Overview
Sometimes, it can be useful to present product information in a table to ease the enrichment, improve the readability of the product sheet, and/or because it is required by law (for instance, to present the nutritional values of a product in the food industry).
This is why we've created a new attribute type: the Table attribute.
This attribute type is available in the Growth Edition and the Enterprise Edition.
Recent Enhancements to capabilities:
We have recently introduced new improvements to our table attribute capabilities, including:
- A fully customizable number of rows, depending on the number of columns in a table
- An increase of the number of table attributes that can be created per PIM catalog, from 50 to 100.
- Two new column types: 'Date' and ‘Product Link’.
- A new first column type: ‘incremental number’ and ‘Product Link’.
- An increase of the number of columns supported from 10 to 25.
- An increase of the character limit per column from 100 to 300.
How to create a Table attribute within Akeneo?
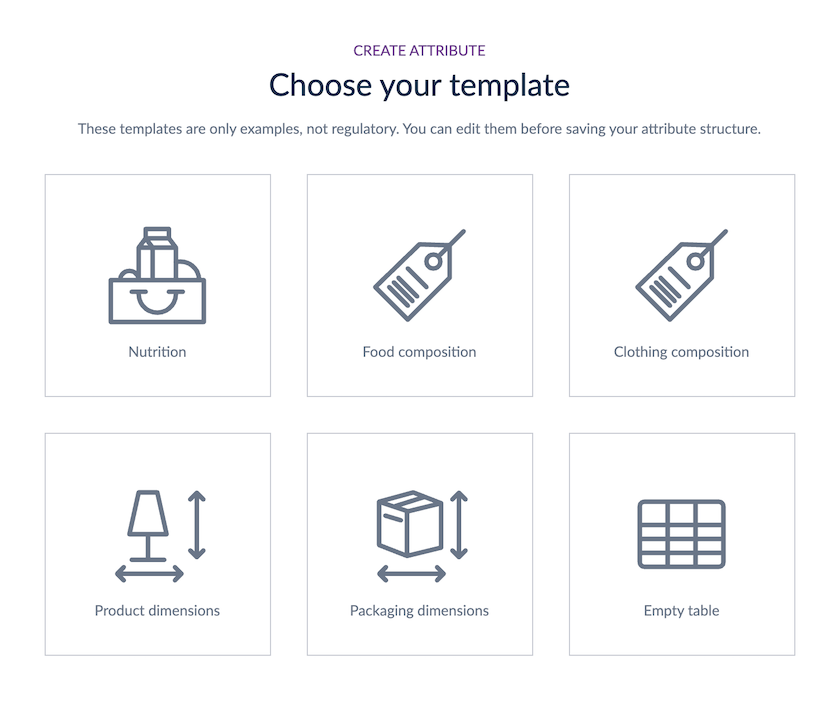
As for the other attribute types, you can create a Table by clicking on Settings > Attributes > Create attribute. Then, click on Table and choose among our templates, or build your own.
These templates are here to guide you. They are only presentation suggestions and can be edited to suit your needs. Choose the Empty table template to create your table from scratch.
Once the template is selected, a pop-in appears asking you to choose a code, a label, and sometimes a standard, depending on the chosen template.
You'll discover a tab called Table structure where you can define your columns.
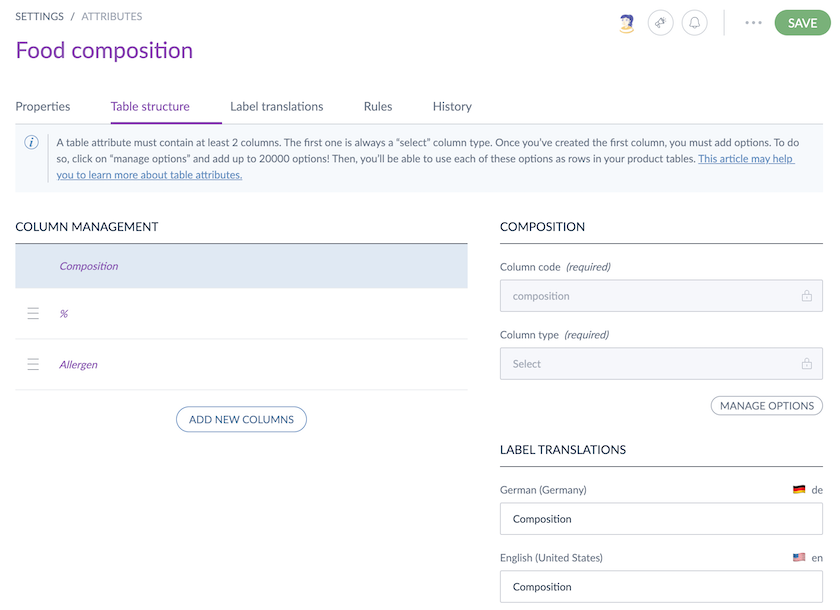
Some columns have already been created for you, except for the Empty table template. You can add new ones simply by clicking on Add new columns.
For each new column, you must define a code, a label, and the type (select, number, text, reference entity, measurement, date or yes/no). The column label can be translated into your catalog locales. You can also change the order of the columns by clicking on the drag-and-drop area.
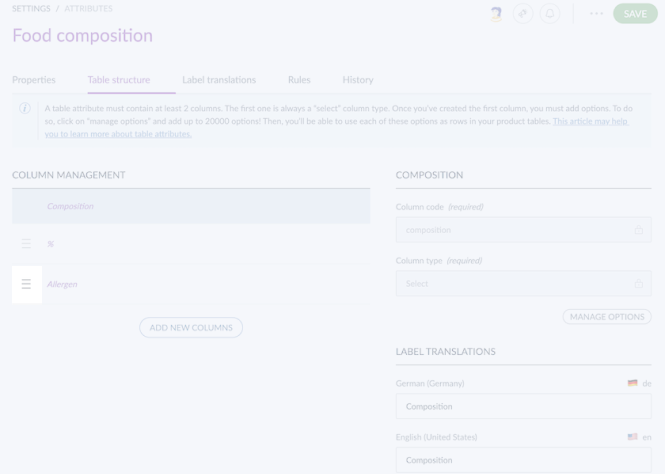
Finally, delete any column you don't need by clicking on the bin (appearing when hovering the row).
Let's imagine you sell food products globally and need to include nutritional values for your products. Since nutritional table formats vary by country or continent and are regulated by national laws, you'll need a separate table for each geographical region. For example, you would require one for the American market, another for the European market, and a third for the UK market. To prevent empty tables in certain locales, we recommend creating three nutritional tables with locale-specific parameters.
Let's discover the table attribute's particularities
We've defined several golden rules to structure a table attribute to leverage the power of the PIM and the Akeneo logic.
A table must contain at least 2 columns.
Each column is defined by a code, a label, and a type. The label can be translated into your catalog locales.
Once the table structure is defined and saved, it cannot be changed afterward.
It means that your columns are frozen once you've clicked on Save. If you need to change the code or column type, delete and re-create it.
The first column is always
- a Select
- a Reference Entity
- an Incremental Number
- a Product Link
The 'Incremental Number' column is hidden in the PIM and generates sequential numbers for each row, allowing you to:
- start your table attribute with any column (text, number, etc.)
- list a reference entity record more than once
The incremental number will be displayed in exports and API calls to help you identify each row.
To structure your table, you can choose among 7 column types:
- Simple Select
- Yes/No (boolean)
- Number
- Text
- Reference entity (EE only)
- Measurement
- Date
Nevertheless, the first column type must always be Simple Select, Reference entity or Incremental number.
We will detail how these 7 column types work in the next section.
Specificity of each column type
Select column type
The Select column type allows you to assign a specific option to each row of your table attribute. By clicking ‘Manage options’, you can manually create new values or save time by importing them from an existing attribute.

Let's focus on a specific use case, if your table attribute is used to list the ingredients of a product, each ingredient is an option of your Select column; this way, you can use it in the Product Edit Form. Check out our dedicated article to discover how to use rows on your product page.
The sorting of the options in the manage options screen is based on their creation date to guarantee the best performances of your PIM.
Directly from the manage options screen, you can add options from a simple or multi-select attribute as an option for your table just by clicking on the Import from existing attribute button.
Note that imported options are not synchronized but are a one-shot copy of existing attribute options. Adding or removing options from the selected simple or multi-select attribute won't change the options of the table column.
In the Text columns, you can set a maximum character limit to control the length of your cell content.
You cannot enter a negative value, and the system restricts the limit to a maximum of 300 characters. In other words, this setting allows you to specify a character limit between 1 and 300.
Text column type
In the Text columns, you can define the maximum number of characters to control the length of your cells' content.
Of course, you cannot define a negative value, and moreover, you are limited to 300 characters by the system. In other words, this parameter lets you define a maximum number of characters between 1 and 300.
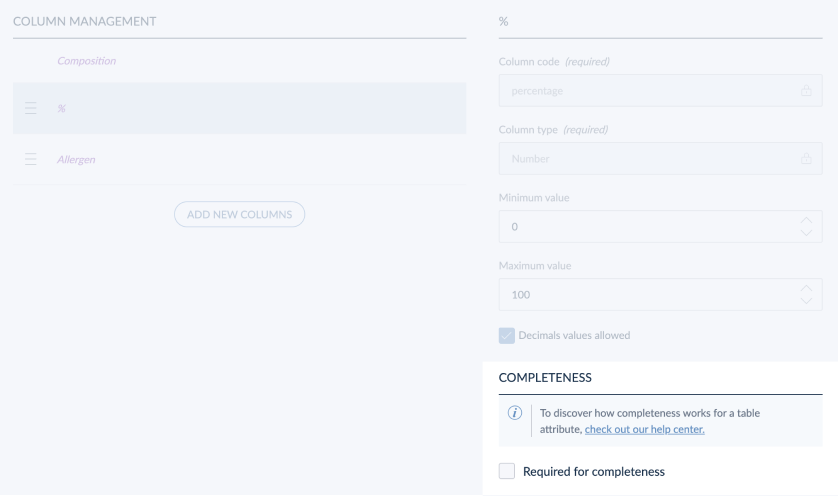
Number column type
In the Number column type, you can specify the minimum and maximum values and whether you allow decimal values.
Yes/No (boolean) column type
There are no validation parameters in this column type!
Reference entity columns type (EE only)
If you already use the reference entity feature to handle your ingredients, materials, or colors as records, you can easily use them in your table attribute. To do so, select the reference entity column type and choose the reference entity to link to get all the existing records as options.
It's impossible to create records from a table attribute.
Measurement column type
In the Measurement column type, you will first be asked to choose the Measurement family your column will inherit from. Then, you will be able to define the Default unit.
Note that the Measurement family cannot be changed once the column has been saved, but the Default unit can.
Date column type
There are no validation parameters in this column type!
Decimals display in the Product Edit Form and during an export/import processes
In a number-type column, if you enter a value with a decimal followed by a nonzero digit (e.g., 2.01), the change will be saved, and the value will be displayed as 2.01.
However, if you enter a value with a decimal followed only by zeros (e.g., 2.00), only the integer part will be retained, displaying as 2.
Product link:
The product link column type provides a more comprehensive way to dynamically link products or product components in the table attribute.
Key benefits from this column type include:
- Product grid: to search for a product that has a link to this product
- Searchability: to benefit from search filters in order to select products to add (including family, and product status : enabled/disabled)
- Image display: to show the product’s main image to guide users
- Ordering: to customize the order of display for the rows
- Assignable by family: to define which families can use this attribute
- Duplicate entries: to allow the same product to be added multiple times in the same table attribute (if the product link is not in the 1st column)
- SKU consistency: to replace manual SKU entry with a structured column to reduce typing errors and improve consistency
- Format consistency: to automatically remove the lines when the product is removed from the table
To find more about this new column type and its limitations, check out the dedicated article on ‘Composable Products’ from our Help Center.
Scalability of a table attribute
To ensure that the PIM keeps running, we have defined some limits.
- You can create up to 25 columns in a single table.
- You can have up to 300 characters in text cells.
- You can create up to 20000 options within a Select column.
- You can create up to 100 table attributes in your PIM.
- You can have up to 8000 filled cells in a product sheet (including all table attributes)
You can now customize the number of rows in your table attributes!
You can now customize the number of rows in a table attribute depending on the number of columns you have in your table.
The configuration automatically adapts by calculating the number of product values you have, allowing for much greater flexibility.
The maximum number of columns remains the same (25), but if you use fewer columns, you will be able to have more rows!
For example,
- With 25 columns → you can have a maximum of 100 rows.
- With 10 columns → you can have a maximum of 250 rows.
- With 2 columns → you can have a maximum of 1 250 rows.
History tab
Just like the other attribute types, there is a History tab.
In this tab, we track the activity on your attribute, such as:
- any change in the attribute properties tab
- or any change in the table structure tab, except if you update the option's labels (within a select column).
- or any change in the label translations tab
Import/export your table data
Import/export the table structure
Import/export the columns
You can import/export a table attribute, like any other attribute types, using the attribute import or attribute export profiles. But, the structure of your table (i.e., the columns of your table) must be written in a JSON format and inserted in the dedicated column of your import/export file, called table_configuration.
The JSON format is not ideal, but there is no other easy way to proceed today. If you need to make some changes via XLSX or CSV files, we recommend exporting your attributes first, fixing errors and re-importing your file.
If you prefer to use the API, please note that the table configuration is part of the Attribute endpoint. To learn more about it, you can refer to our API documentation.
We've developed dedicated import/export profiles for the options of your select column types.
Import/export the options of your “Select” columns
To maintain clarity and prevent confusion between column configurations and select column options within the same file, we have introduced separate import and export profiles specifically for options. These include the table option import and table option export, available in CSV or XLSX format. To know more about imports, please check out the dedicated article, and for exports, everything you need to know is in this article.
And if you are comfortable with the API, you can retrieve the table options within the Attribute that exceeds endpoints, as seen in our API documentation.
When exporting many options in XLSX, please note that the export will fail if the number of characters exceeds 32,767 per cell.
Import/export the table values of a product
As with other attribute types, you can import and export your products with table attributes. CSV and XLSX formats are structured as tables. Therefore, to import the Akeneo PIM table attribute value, it must be formatted in a single cell of your import using the JSON format. This way, it’ll be imported along with other regular attribute values. It’s faster but more technical.
Using “product data table values” import/export jobs
An alternative approach that is more readable and easier to configure is to use dedicated export and import jobs specifically for table attributes. These jobs handle only table attribute values and maintain the same format as displayed in the product edit form.
These dedicated jobs are:
- Product table values import and export (CSV and xlsx)
- Product model table values import and export (CSV and xlsx)
We recommend creating a separate import profile for each table attribute to ensure smooth data handling. These jobs allow you to import and export table values for multiple products that share the same table attribute.
For imports, since each table attribute may have a unique structure, it is essential to avoid mixing tables with different structures in a single file.
For exports, each job should be configured to handle a single attribute at a time.
Example:
If your "food" product family manages composition using a table attribute, you can create a dedicated import profile called "Food Composition." This profile would use the product data table values job to import composition values for multiple food products simultaneously.
What about completeness?
You can define that a table is required for the completeness of a channel. Check out our dedicated article for more information.
We consider a table complete once one cell is filled. You can go further by defining the completeness at the column level by making it required for the completeness of the attribute.
This way, you can easily define three different levels of completeness:
- the table is complete if every cell is filled (you should have checked the completeness option in every column)
- the table is complete if every cell of at least one column is filled (you should have checked the completeness option for one or several columns)
- the table is complete as soon as one cell is filled. In that case, only the completeness option of the first column should be checked. This is the default behavior.
Now that you know all the secrets of the Table attribute type, let's discover its capabilities in the Product Edit Form!